


 This is the Workshop on the Go. You know that in each Workshop on the Go kit that you can make layouts, cards or both and all the instructions are included. If you need more help than that, buy the kit and come join me on the 13th of February and I'll show you how to make them. Click on this link to get to the paypal link and buy the kit and class.
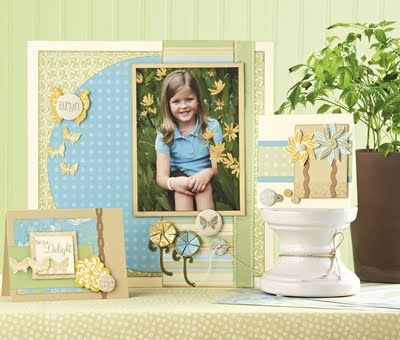
 Here are the cool cards (I've already made them and love the new spray pen)!!
 I'm also using Wings paper to make this cool card box. I would LOVE to do this $25 workshop at your home for your friends. Book with me and we can have your cards organized in no time!
 Speaking of a website, you definitely want one! Almost every business has an online website these days so that people can buy from the comfort of their own homes, why not you? The other benefit are the frequent specials that are website only that you and your friends will want to take advantage of, sometimes discounts for up to 90%! The website is worth $155 all on it's own!
 The third choice includes the Mayberry Kit Workshop on the Go, the Summer Days stamp set, Smoothie and Olive ink, Pink Brads and a 2" x 3 1/2" My Acrylix Block. The value of this is $66.85.
 Now the 4th choice is up my alley. I LOVE this new paper set called Lucky. You get a Workshop on the Go kit in that paper, Lucky Level 2 Assortment, an Enjoy Life stamp (I just bought this one), Outdoor Denim and Desert Sand inks, Kraft Color-Ready borders, a sponge, an edge distresser and a 2 1/2" by 2 1/2" My Acrylix block. The value of this choice is $78.55.
 Choice number five lets you try out our new Quick Pic album plus a Dark Chocolate My Legacy Faux Leather Album plus a Ciao stamp set, Chocolate ink pad and a 4" x 4" My Acrylix block too! The value is $73.60.
 Last up is choice number 6 (remember you get to choose 3 out of the 6) includes a Double Scrubber, My Acrylix Spritz Cleaner, A Tulip stamp set, the Spring Up stamp set, Bless This Nest stamp set, tulip and garden green ink and a 3" by 3" My Acrylix block. Wow!
 What if you can't choose only three? Well, that's no problem because for the discounted price of $40 per choice, you can add the other one, two or three groups that you like!!! Added to all of this is also an Open Me First Brochure, five new Idea Books, You are Welcome Here Brochures, The Rewards Come Now Brochures, Customer Order Forms, Studio J Order Forms, Studio J Membership Membership Cards, Studio J 5-pack cards and Cello Bags too!
  Distress the polka dot paper (with black ink) and wrap it around the back of the black cardstock base back and glue. Fold 1/2 inch over the top of the front of the card and glue.
 Here's what the back should look like.
 Here's how it looks in the front. Distress and add the other polka dot piece at the bottom of the card.
 Here's what the folded strip should sort of look like.
 Now glue that strip down to the card under the polka dot paper.
 Stamp the Sweetheart stamp set words "You're So Sweet" on the white strip of paper, cut apart and distress. Glue to right hand side of card just above the tulip strip.
 Stamp a large and a small heart from the Sweetheart set to your scrap white paper and cut out.
  Add a swirl epoxy sticker from your Sweetheart set (all of these can be found in the Sweetheart Workshop on the Go too)!
 Using Liquid Applique, make 3 dots just above the word sweet.
 Liquid Applique can dry overnight on it's own or you can help it along with a heat gun. It makes it puff up!
 Here's the final product! Have fun!


 Glue polka dot paper in middle of folded card base.
 Glue pink pattern paper strip 1/2 inch down from top of card.
 Add black strip across top of the pink pattern paper strip. Glue white rectangle to center of black cardstock and glue 1/2 inch from left and an inch from top of card. Stamp "so sweet" in black ink at lower black of card.
 Stamp big butterfly in cotton candy ink to center of white cardstock.
 Add dots and heart from the new Sweetheart epoxy stickers.
 Add a sparkle to the butterfly's head and you're done!
 Book a party with me in February and you can order this BRAND NEW PAPER! Call me at (989) 906-6420 or email me at caldreamin05@comcast.net and I'll treat you and your friends to a great scrapbooking and cardmaking party!


This chilled summer dessert looks as good as it tastes! It's an easy no-bake recipe that makes an elegant dessert.
Preparation -
In a large mixing bowl, dissolve the gelatin and sugar in the boiling water. Add the cold water, then place the mixture in the refrigerator to chill until thickened. Remove from the refrigerator and, using an electric mixer at medium speed, beat the thickened jello until it's about double in volume. Whisk in 1 cup of the thawed whipped topping. Place it back in the refrigerator and chill for about 1-1/2 to 2 more hours or until the mixture will mound easily. Place the sliced strawberries in the bottom of the baked pie shell. Spoon the whipped jello mixture over the berries in the pie shell. Refrigerate for at least 4 hours before serving. Garnish with the remaining whipped topping and a few additional strawberries, if desired. Serve chilled. (http://www.bellaonline.com/articles/art10383.asp)


