Tuesday, November 30, 2010

Don't miss Santa's Workshop!

Are you already tired of the long lines and impersonal service you're facing during this holiday shopping time? How about taking a break and actually making a couple of Christmas gifts this year. Imagine the looks on the faces of your loved ones when they open a gift you made with your own two hands. You can't replace the love that shows in a handmade gift PLUS imagine the fun you'll have making them! Come join me for one of my two Santa's workshops in December. I will be hostessing four separate workshops during the days of December 11 and 12.

THE WORKSHOP ON DECEMBER 11TH WILL BE AT MY HOUSE IN STEVENSVILLE.

THE WORKSHOP ON DECEMBER 12 WILL BE AT MY PARENTS' HOUSE AT IN BATTLE CREEK.

TIMES ARE THE SAME FOR BOTH WORKSHOP DAYS.

Pick and choose the ones you'd like to attend. ALL WORKSHOPS REQUIRE A RESERVATION AND PRE-PAYMENT. Prices are below, all monies must be received by December 1st. I take credit and debit cards, paypal, propay, checks and cash. Please let me know AS SOON AS POSSIBLE so I can get your product supplies here in time. This is going to be FUN and a nice break away from the stress the holiday can bring! More details are in my newsletter, sign up to the right.

Workshop One - Altered Card Box - 9-11 a.m. - $25

Workshop Two - Tags and Bags - 12:30-2 p.m. - $10

Workshop Number Three - Accordian Album - 3-5 p.m. - $15

Workshop Number Four - Dimensional Elements Ornaments - 6-8 p.m. - $10

Friday, November 26, 2010

Tangled

If you know me personally you know that I am a big movie lover. In fact, I'm already wondering which movie I might be able to catch today and it's only 8:30 in the morning.

Anyway, even though this is a scrapbooking and stamping blog I want to put out a film recommendation for all of you because I know this is a big movie going weekend.

Last night I took my sister in law, my kids, 2 nephews and 2 nieces to see Tangled, the new Disney animated film. It's incredible! The animation, the story, the characters, acting and music are all right on the money. It hearkens back to The Little Mermaid and Beauty and the Beast for me.

Go see it this weekend, you won't regret it!

In the meantime, make sure you check out my facebook or newsletter for my big Black Friday, Cyber Monday special! All my info is to the right!

Thursday, November 25, 2010

Happy Thanksgiving!

Thanks to all of you wonderful readers and customers for allowing me to have an incredible 2010 with Close to my Heart. You all mean so much to me.

Wednesday, November 24, 2010

Easy ways to find titles for scrapbook pages

Finding a title for my scrapbooking pages has always been a problem for me but lately I've turned to the internet for ideas. There are so many ways to find titles by people who make a living by writing titles. Songwriters are great at coming up with catchy titles. Here are some of the songs from the years 2000 to 2010. Just look how many of them would fit your pages!

Hanging By A Moment
How You Remind Me
Because of You
We Belong Together
She Will Be Loved
Far Away
I Knew I Loved You
With Arms Wide Open
Unwritten
Miss Independent
A Thousands Miles
Irreplaceable
You And Me
I’m With You
Someday
Pieces of Me
Over and Over
My Happy Ending
What A Girl Wants
Get the Party Started
Family Affair
Hot In Here
It’s Been Awhile
Too Little Too Late
Listen to Your Heart

Once you've decided on some titles for your pages, take some time out to sign up for my newsletter list and see the GREAT BLACK FRIDAY/CYBER MONDAY SPECIAL I have JUST FOR MY NEWSLETTER READERS. Sign up above (2nd post down on the right).

Friday, November 19, 2010

How to add more photos to your layout

I have a confession to make. As cool as I thought our new Flip Flaps were, I hadn't sat down to actually use them on a layout....until yesterday. Wow! Is it possible to fall in love with a layout? If it is, I have!

How about 20 photos on a 2 page layout, and not teeny tiny photos, but nice sized ones that you can actually see! That's what you can do with these Flip Flaps? They come in 5 different sizes, 12 in one packet of 4 different sizes and 15 in the other one, all sized 4" by 6". They are amazing and, get this, just $3.95!!! Is there a better priced item than that?

Check this out, here are two Flip Flaps on this left hand page. The first large Flip Flap holds a title and a large mat, the second Flip Flap is to the right, about 4 inches across and holds 2 mats on the outside.

Open up the first Flip Flap and you have two more mats and the beginning of a second title that flow into the 12 x 12 page title. I love this!! Decorate your Flip Flaps the same way you do a regular layout with matching paper, mats and embellishments. I found the pattern for this layout in our new Magic book.

Open the second Flip Flap and you add another mat for a photo and a whole journaling block!

Here's page two of the two page 12 x 12 layout. I used two Flip Flaps of equal size on this one and added SIX new mats!

Flip up the top and you now have another journaling block and mat.

Flip down the bottom Flip Flap and you have another journaling block and mat. Can you see the possibilities?

Now, all you have to do to get your own Flip Flaps is to go to my website HERE!

Thursday, November 18, 2010

Do you like random stamping?

I sure do! When I saw a cute card by Vicki Wizniuk using one of my favorite stamp sets, Tickled Pink, I just had to do my own version of it. It's an easy card for you to make and the beauty of random stamping is that you are creating your own backgrounds. Using the Tickled Pink stamp set or a flowered set of your choice, stamp on a piece of 12 x 12 white daisy cardstock. I used the colors heavenly blue, tulip, buttercup, Indian corn blue and sweet leaf but you can use whatever color combinations you like. A 12 x 12 piece will make 4 cards for you so you can do everything in fours if you like.

Random stamping looks best when you are thinking in triangles. Every three flowers could technically make a triangle if you drew a line between them. If you can keep that in mind your random stamping will be more balanced. Throw some stems in there, it will look cool once you've cut these down into cards.

Add small stamps in between the larger ones and don't forget the centers for those flowers.

Finally add a nice contrasting color like this dark blue, wow, doesn't that make the flowers pop!

Cut the paper 8 1/2 by 11 then cut into fourths to make backgrounds for four cards. Distress with one of the darker colors.

The tulip colored strip is cut 4 1/4 by 2 inches. The white is 4 1/4 by 2 1/4 inches and the Indian corn blue is 4 1/4 by 2 1/2 inches. Layer them on each other after distressing. Add a ribbon of your choice across the center. Make sure you cut the ribbon one inch over on each side to run around the back (no fraying that way).

Stamp a flower of your choice in the lighter blue and roll the edges only into the darker ink. Stamp on a piece of 1 1/2 by 2 inches piece of white paper. Stamp a center in the color of your choice. Add a stem in green and distress the edges of the white paper. Cut a mat out of blue 1 3/4 inches by 2 1/4 inches. Glue the white stamped image on the blue paper, attach with pop dots to the left hand side of the layered strip. Stamp the quote or phrase of your choice on a piece of paper that runs around 3 inches by a half of an inch. Mat it on a red piece of paper cut just 1/4 inch bigger and attach to bottom right of the card. That's it, easy and quick!!


To get yourself some pretty floral stamps, click on this LINK to go directly to my website. Don't forget that you have a chance to get TWO FREE STAMPS this month with a $100 purchase.

Wednesday, November 17, 2010

Quick tips for using Acrylix Stamps

Acrylix stamps are awesome but there are a few tips that will help you get even more value out of them.

1. In each of our stamp sets there is a thin foam sheet. Don't throw this away! This sheet is meant to go under your paper when you are stamping. It's a soft cushion for your stamp to sink down into to make the very best impression. The only time you might want to set the sheet aside is if you are stamping words. I find those tend to make better, crisper impressions on a flat hard surface.

2. When using our cool see through stamps you need a block to place them on. You want to find a block in the size closest to that of your stamp. If you use a block that's too small, not all of your stamp may get an equal application of ink. If you use a block that's too large you might pick up ink on the block that will mar your impression. If you do have a block that's too large and have no choice but to use it, place your stamp near the edge of the block so you have more control and be careful to not tip the block into the ink.

3. A clean stamp is your friend. Keep your stamps clean and they will stick to your block better. If they get messy from glitter you can simply wash them with some water in the sink (make sure the drain is closed)!! Stamps will tend to pinken a bit as you use them. This is normal. I just think that makes them easier to find when I drop them (for the umpteenth time). Our stamps are made with unique materials, take good care of them by using the proper cleaners, our Double Scrubber and My Acrylix Spritz Cleaner are just what you need.

4. When stamping, a good coat of ink is important. I usually twist my stamp on the ink a couple of times (gently) and then pat it on the ink so there are no "twisting" marks. When stamping, go straight down, do not wiggle the block back and forth. Press firmly and you're done!

5. One thing you can do with acrylix stamps that you can't do with the wooden ones is group them together on a block and stamp all at once. . Line up a whole title at once on one of our long 2" by 11" blocks. Group a bunch of posies on a block together and make a quick randomly stamped background. Make a whole Christmas scene with a Santa and his bag of toys. The possibilities are endless with acrylix stamps.

We currently have a special going on. When you order $100 worth of products you not only get the Stamp of the Month for free but also any other A, B, C, or D set for free too! Yep, that's right TWO STAMPS FOR FREE! Order right here on my website today! Special ends on November 30th so don't miss out! TO GET YOUR FREE STAMP, AFTER YOU'VE BROUGHT YOUR ORDER UP TO $100, ADD YOUR STAMP CHOICE TO THE ORDER IN THE SAME PLACE AS YOU PUT THE REST OF YOUR ORDER THEN CHECK TO SEE THAT IT SAYS $0 NEXT TO IT ON YOUR FINAL COST. HAVE FUN!!

Tuesday, November 16, 2010

Silhouette Cards

After having to replace two computers these past couple of months I'm still working on finding all of my photos and gathering them into one file. (Note to self: Print out all photos, don't count on the computer to save them.) Anyway, I pulled up this collection of cards that I made with the retired Silhouette paper set. These were some of my early attempts at making cards, I've only been making them for about two and half years now. If you'd like to get started on making your own cards, go to my website HERE and get the best stamps ever!


Sunday, November 14, 2010

Athens Area Scrapbook Crop - Michigan

I'm so thrilled to be able to share with you the information on a wonderful crop. My Can't Stop Dreaming Team will be one of the vendors for this event. The organizers of this crop are excellent, don't miss out on this one!

Athens Area Scrapbook Crop to benefit local arts & culture projects

Date: Saturday, November 20, 2010
Time: 8:00 AM until 5:00 PM
with arrival and check in beginning at 7:30 AM
Place: Athens Middle School
515 East Williams Street Athens, MI 49011

Cost: $25.00, which includes: All day crop, breakfast, lunch, snacks and beverages, scrapbook tool use, curbside loading and unloading.

Also available during the crop:

Vendors and Door Prizes
Sticker and Paper Swaps
Paper Crafting Classes
Free Make and Takes
Garage Sale Table w/Paper Crafting Items

Registration forms and $25 participation fee are due Saturday, November 6, 2010. Forms available by email or on the AACF website. Sign up now! For more information, please contact Ayesha Franklin at (269) 268-0080 or arts_crop@sbcglobal.net

Saturday, November 13, 2010

Using embellishments with Studio J digital scrapbooking


Thanks so much for following my blog through these tutorials for Studio J, I appreciate it and I hope you are ready to JUMP IN and start with Studio J for yourself. Don't forget that it's absolutely FREE to try it out, you only pay once you fall in love with your layouts and want Close to my Heart to print it out and send it to you. Another nice little bonus is that you get a free jpeg with every layout so you can share the layouts with family and friends before they even arrive in the mail. At the end of this final tutorial and I'm going to show you the memberships that will make your layouts SUPER CHEAP to make.

The final part of making your layouts is decorating them with embellishments. You get three choices, Buttons, Metals, and Ribbons. These are the main embellishments in traditional scrapbooking with Close to my Heart and you won't believe how realistic they look on your layouts!

With each layout mix that you choose there are suggested embellishments already on the layout. You can see them on the layout as you are working on it although they are not colored yet. To color the embellishments, just click on them and choose from the suggested colors that match the layout OR choose any of our 60 colors. You are given three options when coloring:

1. To color all like items (for instance, all buttons on the page)
2. To "uncolor" all like items
3. To color only THIS item that you've clicked on.

With the buttons you also get the option to color the thread too!!

What if you don't like the embellishments they've recommended? Then just click on the embellishments tab at the left on the menu and "uncheck" the Show toggle accents box. That will make them all disappear so you can choose your own embellishments.

Buttons In the buttons section you can click on the suggested colors under the buttons to make them a certain color. Then just left click on the button and slide it to just the spot you want on your layout. Once there you can keep the color you chose or switch to any other color among 60. You can also slide thread over and adjust it in size to fit the buttons you've chosen.

Metals Your choices for the metal embellishments are several, brads, photo hangers, hinges, ribbons slides, photo clips, and staples. Again you can choose the color you want and slide them over onto your layout. Remember to layer, the hinge will need some brads to "hold" it on!!

Ribbons With the ribbons you can choose from several types and bows and tabs too. Slide them over like the above embellishments. Click on the end of any of them and move it to the length you desire. If you want a ribbon slide to look like it's really going through the ribbon, follow these steps:

1. Slide over the ribbon of your choice.
2. Go into the metals section and find the ribbon slide, place it on your ribbon embellishment.
3. Now go back to the ribbon embellishments tab again and find the "within ribbon slide" piece. Put it right on top of your ribbon slide and it will actually conform to look like your ribbon is threaded right through the slide, so cool!!!

Final Steps There are so many other things I could tell you that you could do with Studio J like how you can rotate your pages or even switch page one with page two but I don't want to overwhelm you. Close to my Heart has done a great job to make Studio J very user friendly so you'll see those extras when you start having making layouts. In the meantime, when you finally have the layout just right, hit the "buy project" button. It will then be placed in your checkout box. If you haven't finished everything on your page, a little box will pop up telling you what you need to fix.

Otherwise, go to your cart and you will see your layout with a little peach colored triangle next to it. That triangle tells you that they want you to give a final approval before you buy. Down at the bottom you'll see an "approve layouts" button. Click on that and wait for your layout to load. Once it does, you may enlarge it for final approval. Once it's approved you can't edit it unless you "unapprove" it, you'll see that button right next to the approve button. Once all your layouts are approved and you want to buy, just click on the "check out" button and Close to my Heart will take you the rest of the way.

Thanks again for following my series! Now here is the information on how you can save money with Studio J.

Full Retail
You’ve taken the photos—now keep the memories. In five easy steps, create beautiful 12" × 12" two-page layouts showcasing your stories. When the custom prints arrive at your door, slip them into your cherished albums. No one will guess it only took a few minutes to design them!

Purchase Option Price
Per two-page, custom-printed layout $13.00 US / $15.00 CAN
Shipping per box of up to 20 layouts $5.95 US / $13.95 CAN

--------------------------------------------------------------------------------

Membership
Save an amazing 50% off retail price by becoming a Studio J® member. Only members receive free JPG files of their layouts with each purchased custom-printed layout and also have the option to purchase JPG files separately. JPG files come in both high resolution and thumbnail sizes to print, share, or archive. Membership comes with other perks like exclusive patterns, kits, and free Memory Protectors®. On top of all that, members also get free shipping on their monthly order of 4 to 20 layouts in the continental US or 7 to 20 layouts in Canada and non-continental US shipping zones. For full details, see the FAQ.

Membership Option Price
12-Month membership $99.00 US / $115.00 CAN
3-Month membership $30.00 US / $35.00 CAN
Per two-page, custom-printed layout $6.50 US / $7.50 CAN
Per two-page JPG file $3.00 US / $3.50 CAN
Minimum layouts per order for free shipping 4 (continental US)
7 (non-continental US and Canada)

--------------------------------------------------------------------------------

5-Pack
A 5-pack includes 5 two-page, custom-printed layouts, 5 Memory Protectors, and free shipping. Ideal for gift giving, or as an affordable way to try Studio J for the first time.

Purchase Option Price
5-Pack $55.00 US / $73.00 CAN

--------------------------------------------------------------------------------

Shipping
Close To My Heart products are shipped to the continental United States by Federal Express (FedEx), to the non-continental US by United States Postal Service Priority Mail, and to Canada by Landmark. Studio J layouts ship in a protected box that can hold from 1 to 20 two-page layouts plus Memory Protectors. Standard shipping and handling per box is priced as follows:

Destination Shipping Method Price
Continental US FedEx SmartPost (< 8 days) $ 5.95 US
FedEx Ground (< 5 days) $ 7.95 US
FedEx 2nd Day Air $11.95 US
FedEx Standard Overnight $18.95 US
Hawaii, Alaska, Puerto Rico, Guam USPS Priority Mail $ 9.95 US per box
APO/FPO USPS Priority Mail $ 9.95 US per box
Canada Landmark $13.95 CAN per box


Package Tracking
FedEx or Landmark will notify you by email when an order is shipped so you may track the delivery of your order. Studio J orders shipped through USPS do not have tracking numbers.

Shipping Options
In the continental United States, Studio J customers have 4 shipping methods available through Federal Express (FedEx). These options are not available for destinations outside the continental United States. Upgrading your shipping method will not affect the in-house turnaround time of your order (typically 2 to 4 business days).

Please keep in mind that upgraded shipping methods are guaranteed by the carrier, and Close To My Heart is not responsible for shipping delays after the order has left the warehouse. The shipping options are:

•FedEx Standard Overnight: After leaving Close To My Heart’s corporate office, this option guarantees next-business-day delivery Monday through Friday by 3:00 pm to most US addresses; by 4:30 pm to rural areas.
•FedEx 2nd Day Air: This option guarantees orders will arrive to most areas 2 business days after leaving the corporate office, Monday through Friday by 7:00 pm.
•FedEx Ground: After leaving the corporate office, orders using this option typically arrive within 1 to 5 business days, Tuesday through Saturday between 9 am and 8 pm.
•FedEx SmartPost: After leaving the corporate office, orders using this option typically arrive within 2 to 8 business days. SmartPost orders are delivered via the FedEx network but will use the United States Postal Services (USPS) for final delivery.

Thursday, November 11, 2010

How to add stickers in Studio J digital scrapbooking


This is part seven of my eight part series on Studio J digital scrapbooking. If you don't need my help just CLICK HERE to get started on your own.

The stickers that Close to my Heart sells are called Stickease and they are very popular. Well, you can use them in Studio J too! Once you've put your photos in, added your titles and journaling and picked just the right papers and distressing looks that you want, it's time to start adding embellishments. The easiest are the Stickease. They are already made up for you and you can move them easily over to your layout.
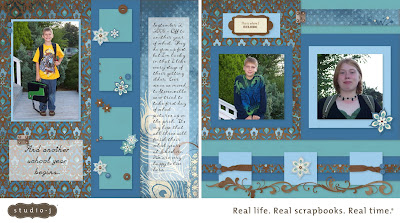
As we discussed yesterday, one of the Stickease embellishments is a fancy alphabet that's meant to go with the particular paper set that you are using. You can simply grab the letters with your mouse and put them anywhere on your layout. Click on them and resize. Hit the garbage can icon to remove.

The second option in the Stickease set are the tags. Just like tags on your regular layouts, use these to label items or even add a file folder tab effect at the top of a photo or a journaling block.

Go up to the Stickease menu again and click on the quotes tab. Here you will cute sayings that you can just slide over onto your layout. Once there, click on them to resize to your liking.

Next up are 3 sizes of accents, large, medium and small. Move any over, click on to resize. One cool thing is to layer accents. You can move these over each other and add brads, buttons and ribbons with them (I'll discuss those tomorrow).

Lastly on the Stickease menu is the borders tab. These can be grabbed and taken over to your layout. Click on the end of the border to resize or to even move over to just the spot you want it. Studio J automatically shortens your border to "stay on" the layout too.

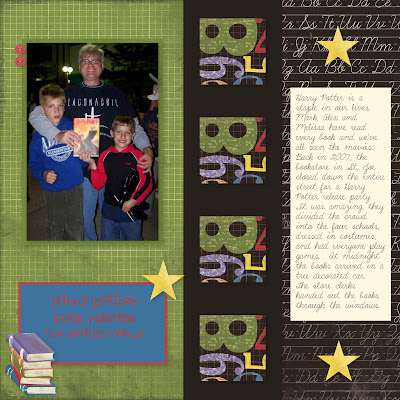
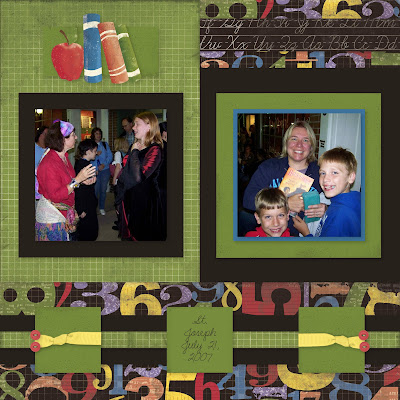
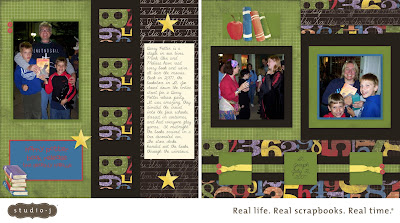
You can see how I used a lot of Stickease above on the layout, the stars and books are all Stickease, sized to my satisfaction and put exactly where I wanted them. Now it's your turn, CLICK HERE to start trying out Studio J for yourself!

Studio J - Adding titles and journaling


Hi and welcome to part six of my series on scrapbooking with Studio J. Today we're going to talk about adding titles and journaling to your page. Now maybe you're not a person who likes to journal and that's fine, BUT IT'S BEST IF YOU AT LEAST PUT NAMES, DATES AND PLACES WHEN SCRAPBOOKING. Those are important items down the line. We've all had that point where someone asked about a person in a picture and we had no idea who they were. Memories fade and we are lucky to have scrapbooking to help use remember special moments.

The Studio J templates already contain spaces for journaling and titles in the spots that they recommend and you can choose to use them or not. Lots of times they are just perfect and just need your words to complete them. Click on the title or journaling block and the menu bar will open up. You can change the font, the size of the font, the color of the font, whether it's bold, or contains italics. You can change how the text is centered or justified, you can move the whole block up or down or center it and you can increase or decrease the amount of distressing all in this menu.

If you put a check mark in the scale font box it will adjust your font size to where it will fit best. Hit edit text to change what you want written there. You can even use spell check!!

The last icon before the garbage can looks like a little head and torso. Click on that and the journal or title box changes to a photo opening instead!

You can adjust the size of the journaling box by clicking on the block and placing your mouse on the diagonal arrow, keep the mouse pressed down and slide the journaling box where you want it. There's also a rotate icon there too at your disposal.

If you don't like the title or journaling block at all, just hit the garbage icon and delete it.

If you decide to put a title or journaling box in a different space on your layout just go over to the text box on the far left menu. There you will find a quick-title tool. Slide it over to where you want it and as you type you'll get special lettering.

You also have a more typical title block with lots of different font choices that can be slid and edited wherever you like it and the same for a journaling block. The last place to find title elements is in the Stickease link in the menu on the far left. An alphabet set will appear that you can grab with your mouse and place anywhere on your layout. Easy as pie!! Now what are you waiting for, go start Studio J right now!

Wednesday, November 10, 2010

Part Five - How to distress in digital scrapbooking with Studio J


I hope you have been enjoying this series on how to use the fabulous digital scrapbooking program, Studio J. Please see the posts below this one if you've missed anything.

Now, I can tell you that you really don't need all these instructions to start Studio J, I'm just helping you skip over some of the learning process here. The truth is, it's so easy to do and I know you can GET STARTED even without my posts here.

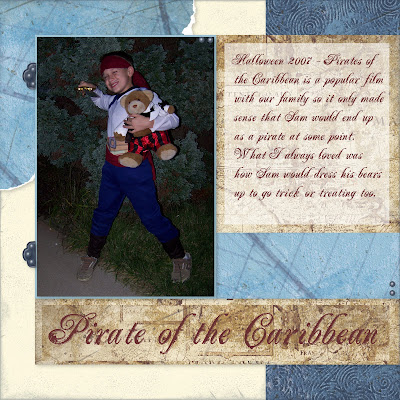
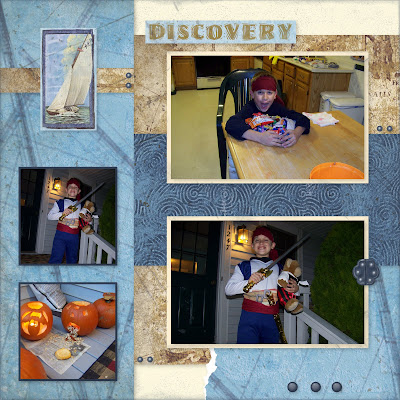
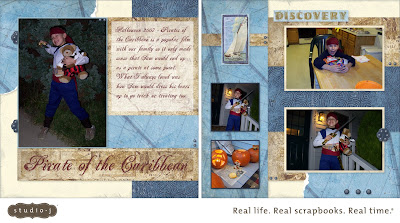
Today I want to tell you a little bit about the distressing tool that you can use when making your Studio J layouts. Distressing is not for everyone or every layout but some layouts are just screaming for some distressing. The one above is a perfect example. My son dressed as a pirate for Halloween a few years back. Distressing is just what this layout needed because I wanted to have a whole rustic, pirate-y, worn out look to the pages. I wanted the whole page to look much like a crinkled old treasure map!

The distressing menu is on the left hand side of your layout editing. You have the opportunity to choose from many colors to distress with (all of them technically but they do offer the best suggestions for the color scheme of the paper set). Choose a color, darker ones to make it really show well, lighter ones if you want a more subtle look.

You are given three types of distressing: CROSS, DIRECT, AND SPONGE. Cross is a criss-cross look with an "x'ed" edge. Direct is more color along the edges and a slightly wrinkled look and sponge is a softer, subtle sponged look. You also can change the surface of the paper by using a SANDING or STUBBLE tool. The stubble is a much rougher look. I use that when I feel like my cardstock looks too modern or smooth.

To use these, click on the tool you want then, using your right finger on the mouse, slide the distressing over to the patterned or cardstock paper on your layout. You do have to do it for each section of paper, you'll see it change right before your eyes. This way you can choose only to distress certain papers if you want.

If the distressing isn't intense enough for you, click on the paper on your layout and change the percentage of distressing. You'll also see an erase tool too, to get rid of the distressing.

YOU CAN EVEN DISTRESS YOUR JOURNALING MAT. It will roughen up the edges so that the journaling block isn't perfectly square or rectangular.

So, that's pretty much it for distressing, it's one of the easiest tools to use and really, it makes a nice difference in your layouts so try it out!

Tuesday, November 9, 2010

Using the paper tools in Studio J digital scrapbooking

Here is part four of my series on Studio J scrapbooking. If you are the type who likes to just jump in, CLICK HERE to start your own Studio J layouts. For those of you who want a few hints, let's talk about paper.

Check out the posts below this one to get up to speed. We've now loaded our photos, adjusted them to whatever color and size we wanted, airbrushed, brightened teeth and are ready to start decorating. It's my favorite product of scrapbooking, paper!! As I said previously, you choose your paper first but you can change it around quite a bit.

1) Click on the paper link on the left hand side of your Studio J page. A whole buffet of pattern papers and cardstocks will pop up. You'll notice that under the pattern choices you have many coordinating color icons. Those will mellow out and make your pattern papers much more subtle in the color you choose. Try them out and see how that works easily. Great! Now you have lots of options for changing the paper choices on your layout. I want to let you know that Studio J is set up so that when you change one of the papers on your layout, all the paper in that pattern or color will change at once. At this time you cannot change just one small section at a time but I wouldn't be surpised if that didn't happen at a later point.

2) Now what I do when my photos are on the layout is to start playing with the paper. I try different pattern papers, full color and one color AND cardstocks in the different sections of my layout. I play until I have a layout that makes me go YES!!!! All you have to do is to left click on the paper of your choice in the paper section and slide it over to the paper you want to change on your layout. Make sure you keep your finger holding down the mouse as you slide.

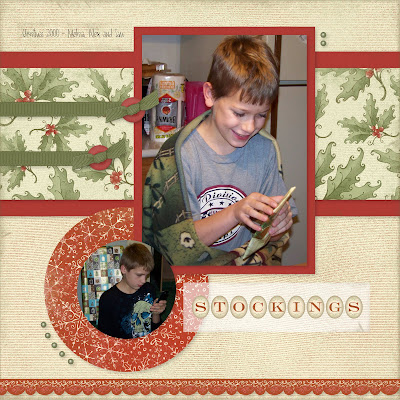
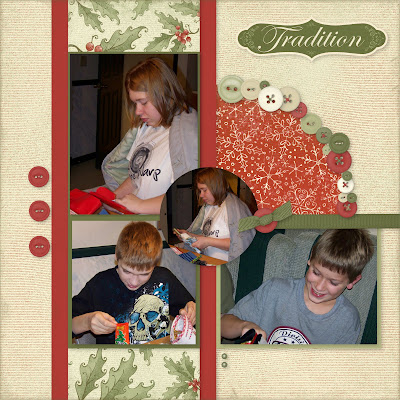
Try to use the gallon, quart, pint rule when choosing your patterns and colors. Use a large amount of one color or pattern, a medium amount of another and a small amount of the third. This will keep your page from being overwhelmed and put the focus where it should be, on the photos. You can see on the layouts below that the colonial white striped pattern is the "gallon" and the holly paper is the "quart" and the red snowflake paper is the "pint."

3) Another way to change the colors of the paper is to click on the paper ON THE LAYOUT. The menu box will pop up and you then have the choice of any of our 60 colors to choose from. It will change the color, even of the pattern paper to anything you want.

4) What if you like the pattern paper you chose but don't like that the print is horizontal? Just click on the paper on the layout and hit the rotate button, it will turn the pattern vertical.

5) What is the paper is right but the intensity of color needs to be taken down a notch? Just click on the paper on the layout and the menu will pop up where you can change the percentage of brightness of that paper. (This option is not possible on every paper set but is on the newer ones).

It's so easy! Are you excited yet? Well, time to get going, click on this LINK and you can start this minute!

Tomorrow we'll be discussing distressing!!