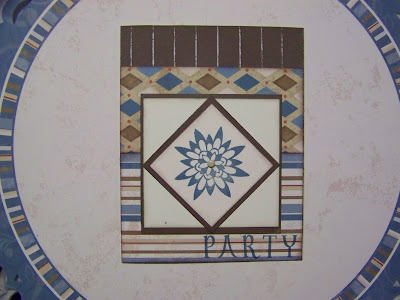
8 1/2 by 5 1/2 card base, fold in half and attach card front to it once you are finished
5 1/2 by 4 1/4 card front made from twilight cardstock
2 1/2 by 4 1/4 striped Felicity pattern paper
2 by 4 1/4 diamond Felicity pattern paper
3 1/4 by 3 1/4 cocoa cardstock
2 1/4 by 2 1/4 cocoa cardstock
3 by 3 colonial white cardstock
2 by 2 colonial white cardstock
All measurements are in inches and you can distress all with cocoa ink.
 Take your paper trimmer (use the groove) and a dry embossing tool to make indented lines in the top inch and a half of your twilight card front. Sand to expose white core. Add striped pattern piece to the bottom keeping it flush with the bottom edge.
 Take the diamond pattern paper and lay it flush against the striped paper and attach.
 Stamp the flower from the Felicity set in twilight ink on the 2 by 2 colonial white piece. Attach it to the cocoa 2 1/4 by 2 1/4 square. Attach 3 by 3 colonial white piece to the 3 1/4 by 3 1/4 mat. Put a brad in the center of the flower BEFORE attaching it to your card. Attach larger piece first then turn the smaller flower piece to a diamond shape and glue in the center of the large 3 1/4 by 3 1/4 piece.
Use the letters in the Felicity stamp set to write the title of your choice and stamp it on your card lower right in twilight. That's it for this card, I'll show off another tomorrow.
 Here's a look at the card with a cocoa cardstock card front. The circular paper around it comes in the kit, you'll love it. Email me and find out how you can get it for free.


No comments:
Post a Comment