Showing posts with label benefits of Close to my Heart. Show all posts

Thursday, December 31, 2009

January 2010 Stamp of the Month Blog Hop

Welcome to the Close to my Heart January Stamp of the Month blog hop. What a mouthful, huh? If you arrived from Jill's blog, you're on the right track. It's a brand new year and time for new ideas. And while I have your attention, don't forget to sign up for my newsletter so you can hear about specials and get projects that are ONLY in my newsletter! Look to the right under my info to sign up.

It's time to be creative and step out of your box or, on the other hand, it's time to make a box!! This is our Close to my Heart My Acrylix organizer but it's not just for stamp sets. This box makes a great card holder. For this particular one I used Animal Cookies paper and, of course, the January Stamp of the Month which is called True Friends. To begin, pull out your paper and cut the first piece 6" by 4". Cut a mat out of Dutch blue cardstock 6 1/4" by 4 1/4" and attach the pattern piece to the cardstock. You may distress all the pieces with Dutch blue ink.

Next cut a piece of Dutch blue cardstock 6" by 2". Take a dry embossing tool and the groove in your trimmer and make lines about 1/2" apart both vertically and horizontally then sand them so the white core of our paper shows. Glue that to the center of your first piece.

Cut a circle out of white cardstock approximately 2 1/2" in diameter. I ran mine through my Cuttlebug so it would have nice texture but that's optional. Glue it to a piece of tulip cardstock that you've cut 2 3/4" in diameter. Attach those to the center of your dry embossed cardstock strip.

Stamp one of the frames on the stamp set in Clover Meadow ink for the frame and then tulip ink for one of the "friendly" sayings in the set. Cut it out and attach to the center of the circle.

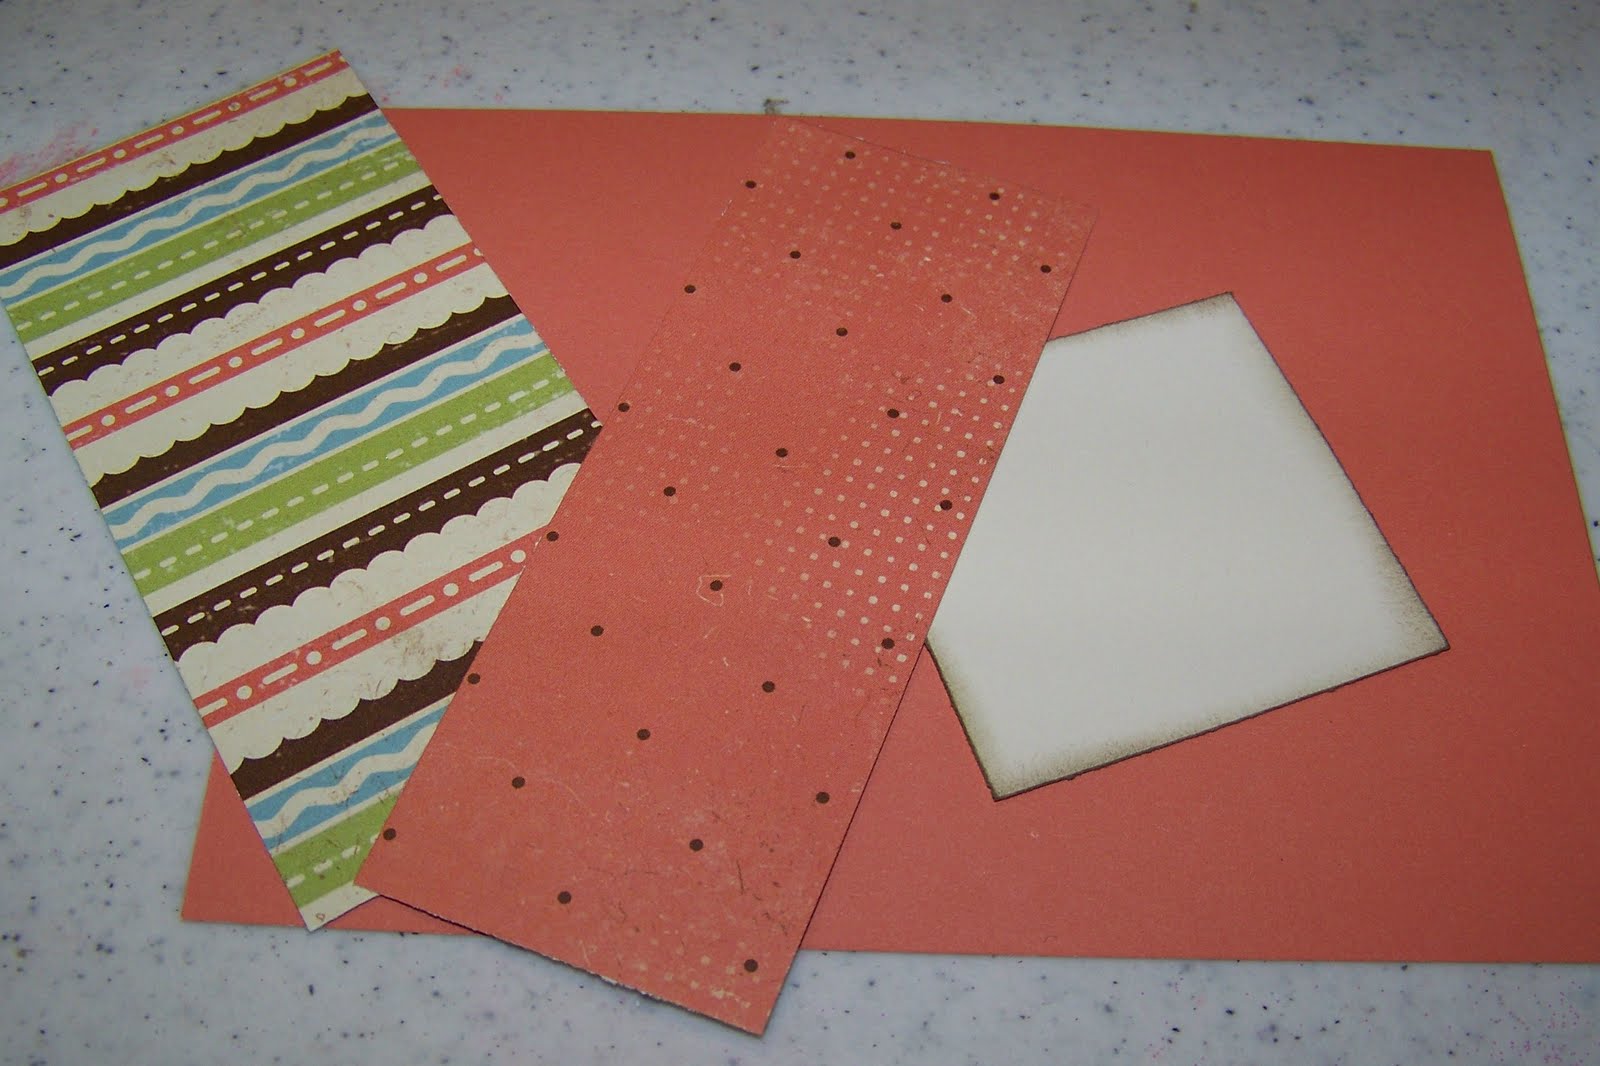
For the sides you want to make them identical and make two of everything that I'm showing here. Cut the pattern paper 6" by 4". Cut three strips of tulip cardstock 1" by 6" and either run them through a crimper or use your trimmer and dry embossing tool to make embossed lines about 1/4" apart along the strips. Sand them and attach to the pattern paper with 1/4" apart.

Cut two white circles (remember to double all these for the two sides) 2 1/2" in diameter and green pattern paper 2 3/4" in diameter and attach to each other and then to the center line of the pattern piece about 1/4" apart from each other in the middle.

Stamp another one of the frames from True Friends, this time in Dutch blue with tulip in the center. Cut out and attach to the center of the circles.

Add three yellow brad to each side of the circles about a 1/2" apart from each other going along the curve of the circle.

For the back, cut your pattern paper 4" by 6" and add a 2" by 6" piece of Dutch blue pattern paper strip and a 5" by 3 1/2" yellow pattern paper piece. Attach them as shown in this picture. Stamp another frame in tulip, the center sentiment in Dutch blue, cut out and add to the center of the blue strip.

Add 8 brads, 1" apart from each other, 4 on the top, 4 on the bottom.

Here's the finished look for the front. Use Tombow to attach, line it up with the lip of the box so it stays straight.

Here's the side, make sure the other side matches.

Here's the back, put lots of glue around and in between the brad backs so it lies flat.

For the inside card dividers cut white cardstock 5" by 6". Distress. Cut pattern paper 4" by 6" and attach to the white cardstock. Cut a piece of tulip cardstock 2" by 2" and cut off the two top corners with a corner rounder (not shown here). Attach to the left for the first divider. You can make as many as you like, I made 16. Attach brads as shown for the first one.

For the second divider, put the tab in the center of the card, for the third, put it at the far right of the card as shown. Attach brads either to the left or right or one on each side depending on where you put the divider tab. Stamp your titles on the tabs. I used the March stamp of the month to do mine. The Say it in Style set works beautifully for this too. Stamp them in Dutch blue. When I did mine I lined the cards up together so I could make sure they were all the same height.

Stick them evenly in the box (there are already dividers in there to help you). You'll put your homemade cards behind them in each category.

To finish it off, use some liquid glass on the handle and wrap it in ribbon tying it up at the top with the bow.

Thanks for visiting my site, you'll be off to Lori's blog now for the next hop, click on this link if you get lost. Blog List Have fun and Happy New Year!

January 2010 blog hop list

Here's the January 2010 Stamp of the Month blog hop list in case you get lost!

Helen Onulak
http://hookedonstamping.com/
Jena DeVries
http://livelovelaughscrapbook.blogspot.com/
Jessica Booth
http://jessicabooth.blogspot.com/
Carla Ironside
http://carlacreates.blogspot.com/
Lori Miller
http://clearlyfromtheheart.blogspot.com/
Misty Jackson
http://misstscraps.blogspot.com/
Jen Patrick
http://roxybonds-scrappin.blogspot.com/
Susan Brooks
http://stampingintheopen.blogspot.com/
Kathleen Androlewicz
http://bowlofstamps.blogspot.com/
Dawn Ross
http://iamahappystamper.blogspot.com/
Amy McVey
http://clearlystamping.blogspot.com/
Antoinette Herrin
http://godblessyourart.blogspot.com/
Jill Lucas
http://scrapwench.blogspot.com/
Barbra Otten
http://barbraotten.blogspot.com/
Lori Brown
http://savingmine.blogspot.com/
Brae Montgomery
http://thebrae-er.blogspot.com/
Wanda Riley
http://creatingwithwanda.blogspot.com/
Adeline E. Brill
http://adeline-brill.blogspot.com/
Kami Welter
http://scrappin4memories.blogspot.com/
Judy Burger
http://makingtimeformemories.blogspot.com/
Pamela O'Connor
http://cherishyourmemories.blogspot.com/
Cindy Leek
http://paperspadsandpictures.blogspot.com/
Mary Eisen
http://www.mestamp2.blogspot.com/
Sylvia Jacquot
http://stampinsylvia.blogspot.com/
Laura Dame
http://thecroppersconnection.blogspot.com/
Melissa Laverty
http://fancymelissa.blogspot.com/
Haley Dyer
http://inkyscrapper.blogspot.com/
Terrie Dodd
http://my-life-in-real-time.blogspot.com/
Katy Donaldson
http://scrappinkaty.blogspot.com/
Chris Shouse
http://houseostamps.wordpress.com/
Tammy Lea Pinchard
http://mycreativeclubhouse.blogspot.com/
Krista Ritskes
http://kristaritskes-simplycreating.blogspot.com/
Shannon Pelletier
http://mycolorfulworldinvt.blogspot.com/
Deb Young
http://scrapbookczar.blogspot.com/
Amy Edwards
http://paisleysplayhouse.blogspot.com/
Sheila Bennett
http://sheila-bennett.blogspot.com/
Kristie Herdener
http://goofyscrapper.blogspot.com/
Jen Rubio
http://jenrubio.blogspot.com/
Jody Gustafson
http://cre8nmemories.blogspot.com/
Sarita Schraeder
http://blogspot.com/
Laurie Levnik
http://creationsbylaurie.blogspot.com/
Debra Van Patten
http://memoriesoftheheartbydeb.blogspot.com/
Kimberly Smith
http://verykimberry.blogspot.com/
Michelle Nist
http://michellenist.blogspot.com/
Karen Norman
http://gettinscrappywithit.blogspot.com/
Traci Godbee
http://createwithtraci.blogspot.com/
Nancy Brown
http://creativelyartsygallery.blogspot.com/
Maricar Harris
http://maricarharris.blogspot.com/
Nona Davenport
http://nonapearl.blogspot.com/
Laurie Newton
http://scrapsfromthebeach.blogspot.com/
Dawn Heuft
http://stamptildawn.blogspot.com/
Melissa Burch
http://melissaburch.blogspot.com/
Kim O'Rear
http://kimorear.blogspot.com/
Michelle Bourlet
http://michellescreativeconnections.blogspot.com/
Angela Tutton
http://tuttonstreasures.blogspot.com/
Jenifer Benner
http://jensmessystudio.com/
Shirley Ross
http://momnmescrap.blogspot.com/
Latisha Haag
http://domestichomefrontcoordinator.blogspot.com/

Tuesday, December 8, 2009

How to alter a notebook

Remember yesterday how I told you all that I take pictures as I process through my papercraft, card or layout? These things don't always go smoothly so I end up taking a lot of photos and then editing later. Today I decided to show all my pictures and the process of altering this notebook to show you that it's totally okay to change your mind halfway through just like I do. I've altered one of these particular notebooks before, they are cheap, $1.00, and I found them at Michael's in their dollar section. They measure approximately 5 by 7 inches.

To decorate this one I used Key to my Heart paper, my absolute favorite, in fact, I bought six packages from the clearance sale (see right sidebar) and am considering buying more before they run out.

For the background cut colonial white cardstock paper 4 1/4 by 6 1/2. Cut the pattern paper 4 by 6 1/4. Distress both pieces with juniper ink.

Cut another pattern paper 6 1/4 by 1 1/2 inches. Distress. Attach two large pieces together then add the strip 1/2 inch from outside mat on the left.

Cut another piece of colonial white cardstock 2 1/4 by 2 1/4 and a matching pattern paper mat 2 1/2 by 2 1/2. Stamp a flower from the Tickled Pink stamp set on a scrap piece of paper in juniper ink then cut it out. Add it to the center of the small mats and attach at a diagonal to the notebook about 1 inch down from the top.

Stamp a small flower center in tulip ink and cut out then attach to the middle of the flower.

Stamp another small design inside the flower circle in juniper ink and you're done. But I wasn't. I studied the almost finished product and completely changed my mind, not liking the center flower at all. I felt like the juniper flower didn't stand out enough and the tulip center was too bright especially since their wasn't much of the tulip coloring in the background paper to make it "fit." I tore the whole middle flower off.

Instead I took out a second set of stamps, Endless Friendship. I used the flowers from that and stamped them in sorbet and the centers in juniper then cut them out. Add the three flowers to the center of the small mat and let them overlap. Take the "so happy" stamp from the Tickled Pink stamp set and stamp it in juniper then cut it out closely around the letters. Add it to the bottom of the notebook. Add a couple of sorbet colored ribbons to the top and bottom bindings and it looks so much better. These are completely low cost but wonderful little stocking stuffers or small gifts for that mail carrier who goes out of her way to give you good customer service or the secretary at your church who always has a smile on her face, you know who I mean, make them feel appreciated.

Saturday, November 28, 2009

All My Love

How often do you let people know how much you appreciate them? Valentine's Day shouldn't be the only day you let your special guy or girl know that you love them. Here's a card to do just that. The set is appropriate, All My Love. and if you like hearts, this is covered with them. The paper is Twitterpated and here are the measurements:

8 1/2 by 5 1/2 colonial white cardstock, folded in half. Once finished with card front, attach it to this base
5 1/2 by 4 1/4 sorbet cardstock
2 by 4 1/4 striped pattern paper
1 3/4 by 4 1/4 sorbet dotted pattern paper
2 by 2 colonial white cardstock

Distress if desired with chocolate ink.

Use your trimmer and a dry embossing tool to make two lines around the outside of each side of the card about a 1/4 inch apart, sand to show white core.

Glue the polka dot paper on the striped paper then attach about and inch and a half down from the top of the card (opening to the right). See how easy this comes together!

Stamp the "i love you" heart on the colonial white cardstock square using sorbet ink.

Glue that piece about a half an inch from top and left hand side of the card.

Stamp the word "cherish" on the card just below the striped piece as shown.

Round the corners with a corner punch and re-distress the edges and you are finished! Give this card to someone you love!

Wednesday, November 25, 2009

Many Thanks

What a perfect title for the day before Thanksgiving! Many Thanks is a beautiful stamp set to play with and teaming it up with Twitterpated paper means you're in for a treat.

Cut your card paper as follows:

8 1/2 by 5 1/2 card base, fold in half, attach whole card front to it once finished
5 1/2 by 4 1/4 sweet leaf cardstock
5 1/4 by 4 striped pattern paper
3 1/2 by 4 blue striped paper (it's the backside of the other striped paper)
3 1/4 by 3 3/4 colonial white cardstock
2 3/4 by 3/4 colonial white cardstock

Distress everything in chocolate ink.

Glue striped paper to the sweet leaf cardstock.

Stamp the largest leaf from the Many Thanks set randomly in chocolate ink on the large colonial white cardstock. This is to fill in the background before you add the cut out leaves.

Glue that piece down to the blue striped and then to the middle of the card, about a 1/2 inch down from the top.

Now on scrap paper, stamp a bunch of the other leaves in sweet leaf, crystal blue and sorbet inks.

Cut them out and begin to add them to the top of the colonial white stamped piece.

Spread them out so that the colors are intermixed well. You can do this with pop dots but because the post office charges extra, I kept mine flat.

Once your card is filled with pretty leaves, stamp Happy Fall in sorbet ink on the small colonial white piece and add to card at the bottom. Glue the whole thing to your card base. Don't forget to sign up for my newsletter to see my Black Friday specials and have a wonderful Thanksgiving!

Tuesday, September 8, 2009

Candy!

A few months back I showed you how to use mailing labels to make cute little wrapped Hershey's Nuggets. Well, I'm making party favors for my new catalog premiere party this Sunday (each person gets a goodie bag full of handmade items as my thank you) and I wanted to make those candy wrappers again and also a little bag topper too. So, let's review how to make the wrappers first. You need some blank mailing labels, I recommend the ones that are 1" by 4". Shorter than 4 inches and the label just barely makes it around the nugget. It's better to have a bit too long than too short.

I used the new stamp set Many Thanks. I started with one of the larger stamps but not too large or half your stamp will disappear off from the label. With this type of random stamping, the rule of threes doesn't matter as much. Simply stamp around the page of labels leaving space for the smaller stamps. I used autumn terracotta.

Next I took the next smallest stamp and used outdoor denim ink. Stamp it in between the other leaves.

Fill in the spaces again with another stamp and honey ink. It's okay if the leaves overlap a bit.

I went ahead with a 4th stamp and used autumn terracotta again, slipping the leaf in the smaller spaces.

Lastly I took a small acorn stamp and the outdoor denim ink and stamped anywhere that need another splash of the darker color.

Once done, peel off a label.

Start your label on the side of the candy, wrap it around keeping the edges flush.

I bought Wilton clear mini treat bags and they just barely fit 4 candies. The bag is too tall for only four candies so you can either trim the top of the bag or fold it over twice. Staple it to hold it steady for your topper.

Here's two options for a topper. You can randomly stamp on a piece of white cardstock just like you did on the labels. Cut out 3" by 4" rectangles, score so that the piece folds down 1 1/2". Distress with outdoor denim ink.

Attach to your bag with a staple on each side. Add a 1" by 1 1/2" piece of white cardstock that you distressed with outdoor denim. Stamp the "many thanks" sentiment in autumn terracotta and add to the topper.

Here's the finished look, cute, huh?

The other option is to cut a 3" by 4" piece of white cardstock, distress with outdoor denim ink and fold. Use one of your leftover labels and stick it right on the middle of the topper then add the "many thanks" label like you did above. Both looks work great! So, do you think my customers will like these Sunday?


If you like this you might also like Candy Time, Part Two.