
Tuesday, November 16, 2010
Silhouette Cards
After having to replace two computers these past couple of months I'm still working on finding all of my photos and gathering them into one file. (Note to self: Print out all photos, don't count on the computer to save them.) Anyway, I pulled up this collection of cards that I made with the retired Silhouette paper set. These were some of my early attempts at making cards, I've only been making them for about two and half years now. If you'd like to get started on making your own cards, go to my website HERE and get the best stamps ever!


Monday, November 15, 2010


Sunday, November 14, 2010
Athens Area Scrapbook Crop - Michigan
I'm so thrilled to be able to share with you the information on a wonderful crop. My Can't Stop Dreaming Team will be one of the vendors for this event. The organizers of this crop are excellent, don't miss out on this one!
Athens Area Scrapbook Crop to benefit local arts & culture projects
Date: Saturday, November 20, 2010
Time: 8:00 AM until 5:00 PM
with arrival and check in beginning at 7:30 AM
Place: Athens Middle School
515 East Williams Street Athens, MI 49011
Cost: $25.00, which includes: All day crop, breakfast, lunch, snacks and beverages, scrapbook tool use, curbside loading and unloading.
Also available during the crop:
Vendors and Door Prizes
Sticker and Paper Swaps
Paper Crafting Classes
Free Make and Takes
Garage Sale Table w/Paper Crafting Items
Registration forms and $25 participation fee are due Saturday, November 6, 2010. Forms available by email or on the AACF website. Sign up now! For more information, please contact Ayesha Franklin at (269) 268-0080 or arts_crop@sbcglobal.net
Athens Area Scrapbook Crop to benefit local arts & culture projects
Date: Saturday, November 20, 2010
Time: 8:00 AM until 5:00 PM
with arrival and check in beginning at 7:30 AM
Place: Athens Middle School
515 East Williams Street Athens, MI 49011
Cost: $25.00, which includes: All day crop, breakfast, lunch, snacks and beverages, scrapbook tool use, curbside loading and unloading.
Also available during the crop:
Vendors and Door Prizes
Sticker and Paper Swaps
Paper Crafting Classes
Free Make and Takes
Garage Sale Table w/Paper Crafting Items
Registration forms and $25 participation fee are due Saturday, November 6, 2010. Forms available by email or on the AACF website. Sign up now! For more information, please contact Ayesha Franklin at (269) 268-0080 or arts_crop@sbcglobal.net
Saturday, November 13, 2010
Using embellishments with Studio J digital scrapbooking


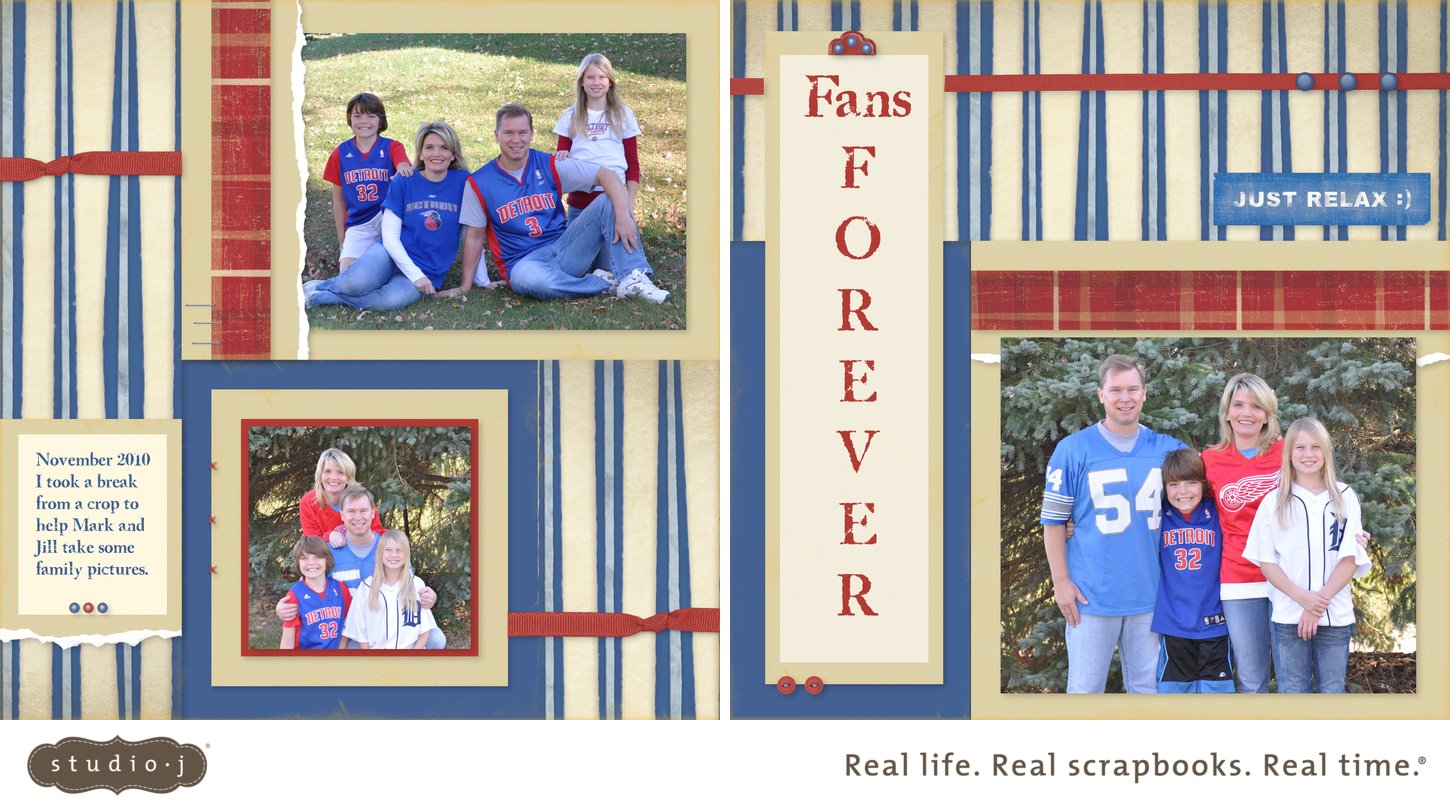
Thanks so much for following my blog through these tutorials for Studio J, I appreciate it and I hope you are ready to JUMP IN and start with Studio J for yourself. Don't forget that it's absolutely FREE to try it out, you only pay once you fall in love with your layouts and want Close to my Heart to print it out and send it to you. Another nice little bonus is that you get a free jpeg with every layout so you can share the layouts with family and friends before they even arrive in the mail. At the end of this final tutorial and I'm going to show you the memberships that will make your layouts SUPER CHEAP to make.
The final part of making your layouts is decorating them with embellishments. You get three choices, Buttons, Metals, and Ribbons. These are the main embellishments in traditional scrapbooking with Close to my Heart and you won't believe how realistic they look on your layouts!
With each layout mix that you choose there are suggested embellishments already on the layout. You can see them on the layout as you are working on it although they are not colored yet. To color the embellishments, just click on them and choose from the suggested colors that match the layout OR choose any of our 60 colors. You are given three options when coloring:
1. To color all like items (for instance, all buttons on the page)
2. To "uncolor" all like items
3. To color only THIS item that you've clicked on.
With the buttons you also get the option to color the thread too!!
What if you don't like the embellishments they've recommended? Then just click on the embellishments tab at the left on the menu and "uncheck" the Show toggle accents box. That will make them all disappear so you can choose your own embellishments.
Buttons In the buttons section you can click on the suggested colors under the buttons to make them a certain color. Then just left click on the button and slide it to just the spot you want on your layout. Once there you can keep the color you chose or switch to any other color among 60. You can also slide thread over and adjust it in size to fit the buttons you've chosen.
Metals Your choices for the metal embellishments are several, brads, photo hangers, hinges, ribbons slides, photo clips, and staples. Again you can choose the color you want and slide them over onto your layout. Remember to layer, the hinge will need some brads to "hold" it on!!
Ribbons With the ribbons you can choose from several types and bows and tabs too. Slide them over like the above embellishments. Click on the end of any of them and move it to the length you desire. If you want a ribbon slide to look like it's really going through the ribbon, follow these steps:
1. Slide over the ribbon of your choice.
2. Go into the metals section and find the ribbon slide, place it on your ribbon embellishment.
3. Now go back to the ribbon embellishments tab again and find the "within ribbon slide" piece. Put it right on top of your ribbon slide and it will actually conform to look like your ribbon is threaded right through the slide, so cool!!!
Final Steps There are so many other things I could tell you that you could do with Studio J like how you can rotate your pages or even switch page one with page two but I don't want to overwhelm you. Close to my Heart has done a great job to make Studio J very user friendly so you'll see those extras when you start having making layouts. In the meantime, when you finally have the layout just right, hit the "buy project" button. It will then be placed in your checkout box. If you haven't finished everything on your page, a little box will pop up telling you what you need to fix.
Otherwise, go to your cart and you will see your layout with a little peach colored triangle next to it. That triangle tells you that they want you to give a final approval before you buy. Down at the bottom you'll see an "approve layouts" button. Click on that and wait for your layout to load. Once it does, you may enlarge it for final approval. Once it's approved you can't edit it unless you "unapprove" it, you'll see that button right next to the approve button. Once all your layouts are approved and you want to buy, just click on the "check out" button and Close to my Heart will take you the rest of the way.
Thanks again for following my series! Now here is the information on how you can save money with Studio J.
Full Retail
You’ve taken the photos—now keep the memories. In five easy steps, create beautiful 12" × 12" two-page layouts showcasing your stories. When the custom prints arrive at your door, slip them into your cherished albums. No one will guess it only took a few minutes to design them!
Purchase Option Price
Per two-page, custom-printed layout $13.00 US / $15.00 CAN
Shipping per box of up to 20 layouts $5.95 US / $13.95 CAN
--------------------------------------------------------------------------------
Membership
Save an amazing 50% off retail price by becoming a Studio J® member. Only members receive free JPG files of their layouts with each purchased custom-printed layout and also have the option to purchase JPG files separately. JPG files come in both high resolution and thumbnail sizes to print, share, or archive. Membership comes with other perks like exclusive patterns, kits, and free Memory Protectors®. On top of all that, members also get free shipping on their monthly order of 4 to 20 layouts in the continental US or 7 to 20 layouts in Canada and non-continental US shipping zones. For full details, see the FAQ.
Membership Option Price
12-Month membership $99.00 US / $115.00 CAN
3-Month membership $30.00 US / $35.00 CAN
Per two-page, custom-printed layout $6.50 US / $7.50 CAN
Per two-page JPG file $3.00 US / $3.50 CAN
Minimum layouts per order for free shipping 4 (continental US)
7 (non-continental US and Canada)
--------------------------------------------------------------------------------
5-Pack
A 5-pack includes 5 two-page, custom-printed layouts, 5 Memory Protectors, and free shipping. Ideal for gift giving, or as an affordable way to try Studio J for the first time.
Purchase Option Price
5-Pack $55.00 US / $73.00 CAN
--------------------------------------------------------------------------------
Shipping
Close To My Heart products are shipped to the continental United States by Federal Express (FedEx), to the non-continental US by United States Postal Service Priority Mail, and to Canada by Landmark. Studio J layouts ship in a protected box that can hold from 1 to 20 two-page layouts plus Memory Protectors. Standard shipping and handling per box is priced as follows:
Destination Shipping Method Price
Continental US FedEx SmartPost (< 8 days) $ 5.95 US
FedEx Ground (< 5 days) $ 7.95 US
FedEx 2nd Day Air $11.95 US
FedEx Standard Overnight $18.95 US
Hawaii, Alaska, Puerto Rico, Guam USPS Priority Mail $ 9.95 US per box
APO/FPO USPS Priority Mail $ 9.95 US per box
Canada Landmark $13.95 CAN per box
Package Tracking
FedEx or Landmark will notify you by email when an order is shipped so you may track the delivery of your order. Studio J orders shipped through USPS do not have tracking numbers.
Shipping Options
In the continental United States, Studio J customers have 4 shipping methods available through Federal Express (FedEx). These options are not available for destinations outside the continental United States. Upgrading your shipping method will not affect the in-house turnaround time of your order (typically 2 to 4 business days).
Please keep in mind that upgraded shipping methods are guaranteed by the carrier, and Close To My Heart is not responsible for shipping delays after the order has left the warehouse. The shipping options are:
•FedEx Standard Overnight: After leaving Close To My Heart’s corporate office, this option guarantees next-business-day delivery Monday through Friday by 3:00 pm to most US addresses; by 4:30 pm to rural areas.
•FedEx 2nd Day Air: This option guarantees orders will arrive to most areas 2 business days after leaving the corporate office, Monday through Friday by 7:00 pm.
•FedEx Ground: After leaving the corporate office, orders using this option typically arrive within 1 to 5 business days, Tuesday through Saturday between 9 am and 8 pm.
•FedEx SmartPost: After leaving the corporate office, orders using this option typically arrive within 2 to 8 business days. SmartPost orders are delivered via the FedEx network but will use the United States Postal Services (USPS) for final delivery.
Thursday, November 11, 2010
How to add stickers in Studio J digital scrapbooking


This is part seven of my eight part series on Studio J digital scrapbooking. If you don't need my help just CLICK HERE to get started on your own.
The stickers that Close to my Heart sells are called Stickease and they are very popular. Well, you can use them in Studio J too! Once you've put your photos in, added your titles and journaling and picked just the right papers and distressing looks that you want, it's time to start adding embellishments. The easiest are the Stickease. They are already made up for you and you can move them easily over to your layout.
As we discussed yesterday, one of the Stickease embellishments is a fancy alphabet that's meant to go with the particular paper set that you are using. You can simply grab the letters with your mouse and put them anywhere on your layout. Click on them and resize. Hit the garbage can icon to remove.
The second option in the Stickease set are the tags. Just like tags on your regular layouts, use these to label items or even add a file folder tab effect at the top of a photo or a journaling block.
Go up to the Stickease menu again and click on the quotes tab. Here you will cute sayings that you can just slide over onto your layout. Once there, click on them to resize to your liking.
Next up are 3 sizes of accents, large, medium and small. Move any over, click on to resize. One cool thing is to layer accents. You can move these over each other and add brads, buttons and ribbons with them (I'll discuss those tomorrow).
Lastly on the Stickease menu is the borders tab. These can be grabbed and taken over to your layout. Click on the end of the border to resize or to even move over to just the spot you want it. Studio J automatically shortens your border to "stay on" the layout too.
You can see how I used a lot of Stickease above on the layout, the stars and books are all Stickease, sized to my satisfaction and put exactly where I wanted them. Now it's your turn, CLICK HERE to start trying out Studio J for yourself!
Studio J - Adding titles and journaling


 Hi and welcome to part six of my series on scrapbooking with Studio J. Today we're going to talk about adding titles and journaling to your page. Now maybe you're not a person who likes to journal and that's fine, BUT IT'S BEST IF YOU AT LEAST PUT NAMES, DATES AND PLACES WHEN SCRAPBOOKING. Those are important items down the line. We've all had that point where someone asked about a person in a picture and we had no idea who they were. Memories fade and we are lucky to have scrapbooking to help use remember special moments.
The Studio J templates already contain spaces for journaling and titles in the spots that they recommend and you can choose to use them or not. Lots of times they are just perfect and just need your words to complete them. Click on the title or journaling block and the menu bar will open up. You can change the font, the size of the font, the color of the font, whether it's bold, or contains italics. You can change how the text is centered or justified, you can move the whole block up or down or center it and you can increase or decrease the amount of distressing all in this menu.
If you put a check mark in the scale font box it will adjust your font size to where it will fit best. Hit edit text to change what you want written there. You can even use spell check!!
The last icon before the garbage can looks like a little head and torso. Click on that and the journal or title box changes to a photo opening instead!
You can adjust the size of the journaling box by clicking on the block and placing your mouse on the diagonal arrow, keep the mouse pressed down and slide the journaling box where you want it. There's also a rotate icon there too at your disposal.
If you don't like the title or journaling block at all, just hit the garbage icon and delete it.
If you decide to put a title or journaling box in a different space on your layout just go over to the text box on the far left menu. There you will find a quick-title tool. Slide it over to where you want it and as you type you'll get special lettering.
You also have a more typical title block with lots of different font choices that can be slid and edited wherever you like it and the same for a journaling block. The last place to find title elements is in the Stickease link in the menu on the far left. An alphabet set will appear that you can grab with your mouse and place anywhere on your layout. Easy as pie!! Now what are you waiting for, go start Studio J right now!
Wednesday, November 10, 2010
Part Five - How to distress in digital scrapbooking with Studio J


 I hope you have been enjoying this series on how to use the fabulous digital scrapbooking program, Studio J. Please see the posts below this one if you've missed anything.
Now, I can tell you that you really don't need all these instructions to start Studio J, I'm just helping you skip over some of the learning process here. The truth is, it's so easy to do and I know you can GET STARTED even without my posts here.
Today I want to tell you a little bit about the distressing tool that you can use when making your Studio J layouts. Distressing is not for everyone or every layout but some layouts are just screaming for some distressing. The one above is a perfect example. My son dressed as a pirate for Halloween a few years back. Distressing is just what this layout needed because I wanted to have a whole rustic, pirate-y, worn out look to the pages. I wanted the whole page to look much like a crinkled old treasure map!
The distressing menu is on the left hand side of your layout editing. You have the opportunity to choose from many colors to distress with (all of them technically but they do offer the best suggestions for the color scheme of the paper set). Choose a color, darker ones to make it really show well, lighter ones if you want a more subtle look.
You are given three types of distressing: CROSS, DIRECT, AND SPONGE. Cross is a criss-cross look with an "x'ed" edge. Direct is more color along the edges and a slightly wrinkled look and sponge is a softer, subtle sponged look. You also can change the surface of the paper by using a SANDING or STUBBLE tool. The stubble is a much rougher look. I use that when I feel like my cardstock looks too modern or smooth.
To use these, click on the tool you want then, using your right finger on the mouse, slide the distressing over to the patterned or cardstock paper on your layout. You do have to do it for each section of paper, you'll see it change right before your eyes. This way you can choose only to distress certain papers if you want.
If the distressing isn't intense enough for you, click on the paper on your layout and change the percentage of distressing. You'll also see an erase tool too, to get rid of the distressing.
YOU CAN EVEN DISTRESS YOUR JOURNALING MAT. It will roughen up the edges so that the journaling block isn't perfectly square or rectangular.
So, that's pretty much it for distressing, it's one of the easiest tools to use and really, it makes a nice difference in your layouts so try it out!
Tuesday, November 9, 2010
Using the paper tools in Studio J digital scrapbooking
Here is part four of my series on Studio J scrapbooking. If you are the type who likes to just jump in, CLICK HERE to start your own Studio J layouts. For those of you who want a few hints, let's talk about paper.
Check out the posts below this one to get up to speed. We've now loaded our photos, adjusted them to whatever color and size we wanted, airbrushed, brightened teeth and are ready to start decorating. It's my favorite product of scrapbooking, paper!! As I said previously, you choose your paper first but you can change it around quite a bit.
1) Click on the paper link on the left hand side of your Studio J page. A whole buffet of pattern papers and cardstocks will pop up. You'll notice that under the pattern choices you have many coordinating color icons. Those will mellow out and make your pattern papers much more subtle in the color you choose. Try them out and see how that works easily. Great! Now you have lots of options for changing the paper choices on your layout. I want to let you know that Studio J is set up so that when you change one of the papers on your layout, all the paper in that pattern or color will change at once. At this time you cannot change just one small section at a time but I wouldn't be surpised if that didn't happen at a later point.
2) Now what I do when my photos are on the layout is to start playing with the paper. I try different pattern papers, full color and one color AND cardstocks in the different sections of my layout. I play until I have a layout that makes me go YES!!!! All you have to do is to left click on the paper of your choice in the paper section and slide it over to the paper you want to change on your layout. Make sure you keep your finger holding down the mouse as you slide.
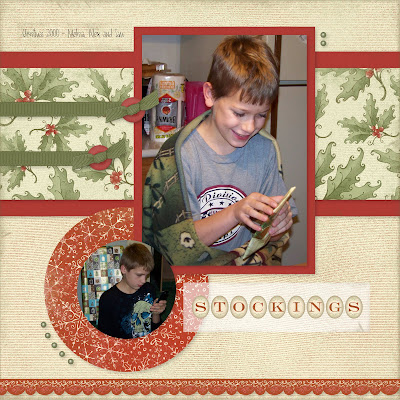
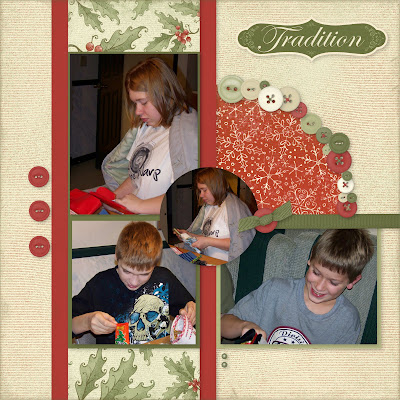
Try to use the gallon, quart, pint rule when choosing your patterns and colors. Use a large amount of one color or pattern, a medium amount of another and a small amount of the third. This will keep your page from being overwhelmed and put the focus where it should be, on the photos. You can see on the layouts below that the colonial white striped pattern is the "gallon" and the holly paper is the "quart" and the red snowflake paper is the "pint."
3) Another way to change the colors of the paper is to click on the paper ON THE LAYOUT. The menu box will pop up and you then have the choice of any of our 60 colors to choose from. It will change the color, even of the pattern paper to anything you want.
4) What if you like the pattern paper you chose but don't like that the print is horizontal? Just click on the paper on the layout and hit the rotate button, it will turn the pattern vertical.
5) What is the paper is right but the intensity of color needs to be taken down a notch? Just click on the paper on the layout and the menu will pop up where you can change the percentage of brightness of that paper. (This option is not possible on every paper set but is on the newer ones).
It's so easy! Are you excited yet? Well, time to get going, click on this LINK and you can start this minute!
Tomorrow we'll be discussing distressing!!

Check out the posts below this one to get up to speed. We've now loaded our photos, adjusted them to whatever color and size we wanted, airbrushed, brightened teeth and are ready to start decorating. It's my favorite product of scrapbooking, paper!! As I said previously, you choose your paper first but you can change it around quite a bit.
1) Click on the paper link on the left hand side of your Studio J page. A whole buffet of pattern papers and cardstocks will pop up. You'll notice that under the pattern choices you have many coordinating color icons. Those will mellow out and make your pattern papers much more subtle in the color you choose. Try them out and see how that works easily. Great! Now you have lots of options for changing the paper choices on your layout. I want to let you know that Studio J is set up so that when you change one of the papers on your layout, all the paper in that pattern or color will change at once. At this time you cannot change just one small section at a time but I wouldn't be surpised if that didn't happen at a later point.
2) Now what I do when my photos are on the layout is to start playing with the paper. I try different pattern papers, full color and one color AND cardstocks in the different sections of my layout. I play until I have a layout that makes me go YES!!!! All you have to do is to left click on the paper of your choice in the paper section and slide it over to the paper you want to change on your layout. Make sure you keep your finger holding down the mouse as you slide.
Try to use the gallon, quart, pint rule when choosing your patterns and colors. Use a large amount of one color or pattern, a medium amount of another and a small amount of the third. This will keep your page from being overwhelmed and put the focus where it should be, on the photos. You can see on the layouts below that the colonial white striped pattern is the "gallon" and the holly paper is the "quart" and the red snowflake paper is the "pint."
3) Another way to change the colors of the paper is to click on the paper ON THE LAYOUT. The menu box will pop up and you then have the choice of any of our 60 colors to choose from. It will change the color, even of the pattern paper to anything you want.
4) What if you like the pattern paper you chose but don't like that the print is horizontal? Just click on the paper on the layout and hit the rotate button, it will turn the pattern vertical.
5) What is the paper is right but the intensity of color needs to be taken down a notch? Just click on the paper on the layout and the menu will pop up where you can change the percentage of brightness of that paper. (This option is not possible on every paper set but is on the newer ones).
It's so easy! Are you excited yet? Well, time to get going, click on this LINK and you can start this minute!
Tomorrow we'll be discussing distressing!!


Monday, November 8, 2010
How to work with photos on Studio J
This is the third part in a series on how to use Studio J digital scrapbooking. Look below for the last two installments.
Studio J is very easy and you probably don't even need my help or instructions at all but I'm posting some of what I've discovered using it in case you do want a little help. If not, time to try it out RIGHT HERE!
You've logged in now, uploaded your pictures, chosen your paper kit and pattern template and moved your pictures into place. Let's now look at some of the cool things you can do to your photos. Click on one of the pictures you've placed and see a whole menu pop up.
SCALE: The scale tool allows you to make your pictures larger or smaller so that your photo will fit perfectly into the template space. Normally I find I don't even have to use it because Studio J already does a great automatic job, but occasionally you may need to make your picture larger or smaller. This saves you a lot of time on editing before you upload your pictures. You can do it right on Studio J.
ROTATE: What if your picture isn't exactly rotated right, you took it on an angle and want it straight or you want a straight picture on an angle? Use the rotate key to get it just right.
The next three buttons are easy:
1) Remove picture from that template spot. (Don't worry, Studio J actually puts a check on the pictures you've used and removes it when you move the picture from the template position so you won't have to keep track).
2) Flip horizontally. Make your photo look the other way. Remember it's always best to not have the people in your photos looking off the page.
3) Flip vertically. Now I'm not sure how many times you may need to do this but you never know!
EDIT PHOTOS ICON: Now this button is fun. Control brightness, contrast, hue and sharpen your picture here. Who needs to be a great photographer with the ability to fix everything!! Want to erase a wrinkle, smooth out bad skin, whiten teeth? Click on the "select tool" button and do all that and more! Just choose your tool, the size of tool you'll need, and move your mouse to the photo and go to town. Now we can all look airbrushed like the models on magazines. Don't like the fixing you did? Click "undo" and do it again.
What if you don't want a photo in that template spot, instead you want a journal block? Just click on the next icon, "convert to text well (or convert to photo well)" to switch from one to the other.
Finally the last icon on the top of your photo is the delete photo or garbage button. Only use this if you don't want the photo to remain uploaded at all.
FILTER: On the bottom of the photo menu you have the option to turn your photo from full color to black or white or sepia. I'm doing this on a layout about the small town we visit often, St. Joseph, Michigan. It's been around forever so I thought it would be cool to have the photos look older.
MAT: I'm a big fan of mats around my photos. It's their very own picture frame. With the mat tool you can make mats in different widths and different colors. Choose your width size in the pull down menu and then the color box will pop up. At the top of the colors are the hues that Studio J recommends for this particular paper set but you have the option of using any of the 60 different colors that we make.
CLEAR DISTRESSING: The last icon is to clear distressing when you've put it on. You'll do that with the distressing tool on the left hand side of the page, I'll explain that tool in another post.
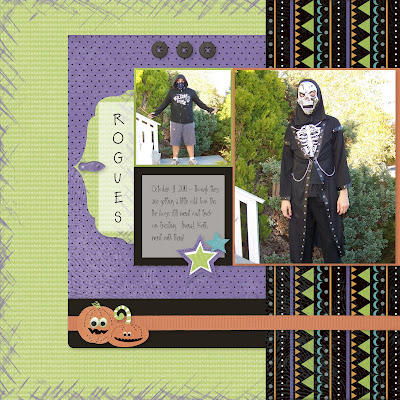
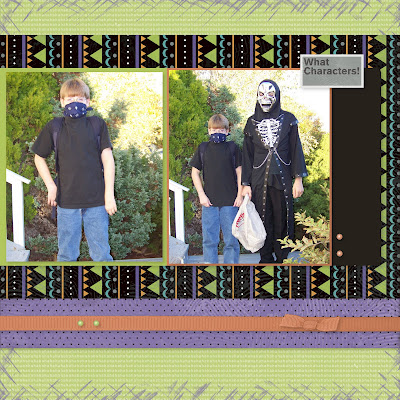
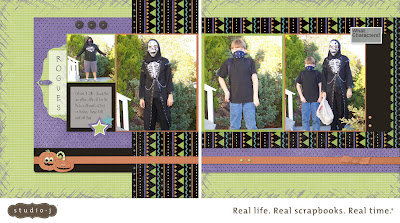
Tomorrow we'll talk about how to change the patterns and cardstock papers on your layout. In the meantime, how fast do you get your Halloween pictures done? Halloween was just a few days ago and my layout is finished with Studio J!
Studio J is very easy and you probably don't even need my help or instructions at all but I'm posting some of what I've discovered using it in case you do want a little help. If not, time to try it out RIGHT HERE!
You've logged in now, uploaded your pictures, chosen your paper kit and pattern template and moved your pictures into place. Let's now look at some of the cool things you can do to your photos. Click on one of the pictures you've placed and see a whole menu pop up.
SCALE: The scale tool allows you to make your pictures larger or smaller so that your photo will fit perfectly into the template space. Normally I find I don't even have to use it because Studio J already does a great automatic job, but occasionally you may need to make your picture larger or smaller. This saves you a lot of time on editing before you upload your pictures. You can do it right on Studio J.
ROTATE: What if your picture isn't exactly rotated right, you took it on an angle and want it straight or you want a straight picture on an angle? Use the rotate key to get it just right.
The next three buttons are easy:
1) Remove picture from that template spot. (Don't worry, Studio J actually puts a check on the pictures you've used and removes it when you move the picture from the template position so you won't have to keep track).
2) Flip horizontally. Make your photo look the other way. Remember it's always best to not have the people in your photos looking off the page.
3) Flip vertically. Now I'm not sure how many times you may need to do this but you never know!
EDIT PHOTOS ICON: Now this button is fun. Control brightness, contrast, hue and sharpen your picture here. Who needs to be a great photographer with the ability to fix everything!! Want to erase a wrinkle, smooth out bad skin, whiten teeth? Click on the "select tool" button and do all that and more! Just choose your tool, the size of tool you'll need, and move your mouse to the photo and go to town. Now we can all look airbrushed like the models on magazines. Don't like the fixing you did? Click "undo" and do it again.
What if you don't want a photo in that template spot, instead you want a journal block? Just click on the next icon, "convert to text well (or convert to photo well)" to switch from one to the other.
Finally the last icon on the top of your photo is the delete photo or garbage button. Only use this if you don't want the photo to remain uploaded at all.
FILTER: On the bottom of the photo menu you have the option to turn your photo from full color to black or white or sepia. I'm doing this on a layout about the small town we visit often, St. Joseph, Michigan. It's been around forever so I thought it would be cool to have the photos look older.
MAT: I'm a big fan of mats around my photos. It's their very own picture frame. With the mat tool you can make mats in different widths and different colors. Choose your width size in the pull down menu and then the color box will pop up. At the top of the colors are the hues that Studio J recommends for this particular paper set but you have the option of using any of the 60 different colors that we make.
CLEAR DISTRESSING: The last icon is to clear distressing when you've put it on. You'll do that with the distressing tool on the left hand side of the page, I'll explain that tool in another post.
Tomorrow we'll talk about how to change the patterns and cardstock papers on your layout. In the meantime, how fast do you get your Halloween pictures done? Halloween was just a few days ago and my layout is finished with Studio J!


Sunday, November 7, 2010
Getting started with Studio J
Yesterday I told you I had become obsessed with Studio J. Well, guess what? You can start playing with Studio J WITHOUT spending a cent!! That's right, because there is nothing to download or purchase to get started, it doesn't cost you anything to just go try it out!!!
1) Go to Studio J HERE and sign in as "not ready to create an account" user. It will take you directly to Studio J's start page.
2) Click on Create a new project.
3) Choose a name for your project (this will not be the title so any name will do).
4) Click on the button that says "upload photos" and upload a few from your computer.
5) Once uploaded, click on continue (it's at the bottom lower side).
6) Now comes the fun!! Choose a paper kit!! Don't worry if you don't like every single paper in any kit because you can pick and choose once you start creating. I usually choose something that goes with the theme and the colors of my photos.
7) Choose a pattern next. Go over to the top right of the page and you'll see a pull down menu where you can choose how many photos you need to put on the page. Find a template you like.
8) Next you can choose a kit mix, remembering again, that you can change many of the papers and where they are on the page.
9) Once your page loads, just go over to your photos with your mouse and move them into the photo opening that you like. The photo will be adjusted to fit but if it's not quite perfect, click on the center and a "hand" will appear, use your mouse to move the photo to center it.
Once your photo is in, you start decorating and refining. We'll talk about that tomorrow but you can GET STARTED TODAY!
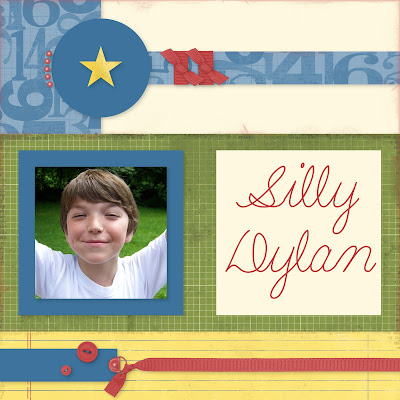
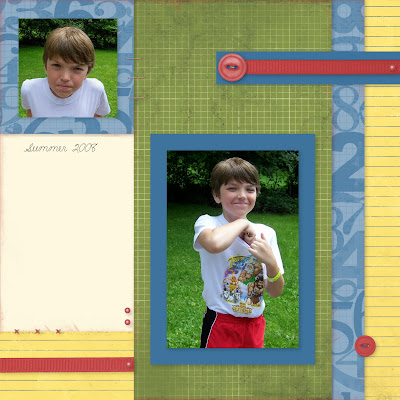
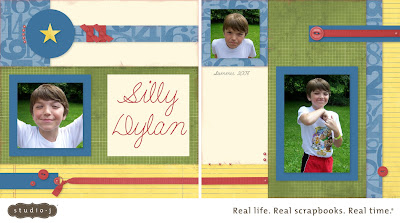
Here's my nephew Dylan being his adorable self!
1) Go to Studio J HERE and sign in as "not ready to create an account" user. It will take you directly to Studio J's start page.
2) Click on Create a new project.
3) Choose a name for your project (this will not be the title so any name will do).
4) Click on the button that says "upload photos" and upload a few from your computer.
5) Once uploaded, click on continue (it's at the bottom lower side).
6) Now comes the fun!! Choose a paper kit!! Don't worry if you don't like every single paper in any kit because you can pick and choose once you start creating. I usually choose something that goes with the theme and the colors of my photos.
7) Choose a pattern next. Go over to the top right of the page and you'll see a pull down menu where you can choose how many photos you need to put on the page. Find a template you like.
8) Next you can choose a kit mix, remembering again, that you can change many of the papers and where they are on the page.
9) Once your page loads, just go over to your photos with your mouse and move them into the photo opening that you like. The photo will be adjusted to fit but if it's not quite perfect, click on the center and a "hand" will appear, use your mouse to move the photo to center it.
Once your photo is in, you start decorating and refining. We'll talk about that tomorrow but you can GET STARTED TODAY!
Here's my nephew Dylan being his adorable self!


Saturday, November 6, 2010
How to get started with digital scrapbooking
Do you remember when you first started scrapbooking? It didn't take long to really become obsessed with it, did it? Well, I'm a traditional scrapbooker but this week I've found a new obsession, digital scrapbooking with Studio J. It's Close to my Heart's program and it's been out about a year and I made a few layouts with it but this week, suddenly, I've become obsessed with it. That doesn't mean I'm giving up traditional scrapping at all, I'm a die-hard, but wow, I can't believe how fast and easy Studio J is. Yesterday, in less than 2 hours I made 8 complete two page layouts and bought them! Close to my Heart gives you a free jpeg with each layout if you are a member of Studio J so I'm going to share one a day with you all as I take you through the steps of acquiring your own Studio J obsession. If you don't need to be talked through it, just CLICK HERE to get started! More tomorrow!!!


Friday, November 5, 2010
Jobs still available in hard times
When I told my husband this past summer that I wouldn't be signing up to substitute teach anymore, he was totally okay with it. My Close to my Heart business was fulfilling my goal of being able to quit subbing. I was making enough money so that I no longer had to teach. As the article below shows, direct sales are a great way to make money in hard times and the beauty of it is that there are no job interviews. You simply sign on and get going. That's what I did and now I'm having the time of my life selling my favorite things, scrapbooking and stamping supplies. I have met and become friends with so many other crafters because of this "job" and I get out of the house to show other people how to preserve their memories and enrich their relationships. What could be better than that? You can do it too. I am very hands on with my team members and take you through the steps so that you, too, can make money and have your dreams come true. To sign up and join my team, CLICK HERE.
NASHVILLE, Tenn. – Armies of new Avon ladies, Mary Kay reps and Tupperware sellers are advancing on living rooms across the country, their ranks full of professionals forced to take a second job amid the recession.
Becke Alexander, sales manager for New York-based Avon Products Inc., hears each week from laid-off bankers and stay-at-home moms, but also gainfully employed people worried how long they'll stay that way. All of them are willing to knock on doors, host parties or do whatever else it takes to peddle some makeup.
"'I need money.' That's what I've been hearing since about November," Alexander said. "There are no hobby seekers coming here. It's people with a legitimate need."
Job cuts, shrinking bonuses and scaled-back hours have pushed more people than ever to become direct sales representatives, a phenomenon industry experts say they've seen before.
In the 1990-1991 recession, the number of direct sellers increased 8 percent to 5.1 million Americans. In the 2001 recession, the work force increased to 12.2 million.
And while 2008 figures are not yet available, in 2007 an estimated 15 million people nationwide were in direct sales. Some 58 percent of became reps as a second job, according to the Direct Selling Association, a trade group that represents 200 U.S. companies.
When money began getting tight in Nicole Robinson's household in Garland, Texas, the full-time pharmaceutical sales rep signed up to host Mary Kay parties and give facials, working just six hours to make about $600 a week.
"Costs aren't going down and opportunities are tightening up. Raises and bonuses aren't as big. And I didn't want to ever be in a situation where we were in jeopardy," said Robinson, who joined Mary Kay Cosmetics Inc. in September.
Business declined at the international cell phone company her husband works for, she said, and they wanted to continue their moderate lifestyle and contribute to their children's college funds.
"We were looking for a plan B for our family to make additional income," she said. "We really didn't want to participate in the recession."
Rhonda Shasteen, chief marketing director for Mary Kay, said the Addison, Texas-based company saw traffic on its Web site increase by 108 percent in March, when the company began airing television ads to attract new sales reps.
The sales force grew 22 percent from January to March, compared with the same period last year. The privately owned company wouldn't say whether its profits also increased during that period.
Orlando, Fla.-based Tupperware Brands said globally it's making more money and has more people selling its products, spokeswoman Nora Alonso said.
Direct sales reps can earn commissions between 25 to 50 percent of retail sales, and some companies will also pay for recruiting a new sales person. Direct sellers also can earn rewards, too, including jewelry, handbags, furniture, appliances, cars and vacations.
There can be expenses. It costs about $10 to get the Avon starter kit of products and brochures, and some companies require the sales people to purchase products wholesale and then resell them. Mary Kay consultants purchase mascara for $7.50; the company recommends they sell it for twice that.
Companies that are members of the Direct Selling Association are required to have buyback programs where they refund at least 90 percent of costs to sales representatives who get stuck with products.
During stronger economies, people usually take on direct sales jobs so they can have money for leisure spending, said Larry Chonko, business ethics professor at The University of Texas at Arlington.
"Times are tough as we know and there is an absolute need for extra income," Chonko said. "Direct sales is not recession-proof, but it is the kind of business that even in a recession you can make success of it. And if you create a solid foundation now, then just wait until the economy comes out of the down cycle and goes into an up cycle."
Melanie Lyke, 29, of Thompson's Station, Tenn., began working as an Avon independent sales rep in November to supplement her income after a slowdown in the family's company, which makes training and demo videos for corporations.
"This is a great solution for people in need because I work at my own pace," Lyke said. "All you need is a clear goal and be determined to reach it."
NASHVILLE, Tenn. – Armies of new Avon ladies, Mary Kay reps and Tupperware sellers are advancing on living rooms across the country, their ranks full of professionals forced to take a second job amid the recession.
Becke Alexander, sales manager for New York-based Avon Products Inc., hears each week from laid-off bankers and stay-at-home moms, but also gainfully employed people worried how long they'll stay that way. All of them are willing to knock on doors, host parties or do whatever else it takes to peddle some makeup.
"'I need money.' That's what I've been hearing since about November," Alexander said. "There are no hobby seekers coming here. It's people with a legitimate need."
Job cuts, shrinking bonuses and scaled-back hours have pushed more people than ever to become direct sales representatives, a phenomenon industry experts say they've seen before.
In the 1990-1991 recession, the number of direct sellers increased 8 percent to 5.1 million Americans. In the 2001 recession, the work force increased to 12.2 million.
And while 2008 figures are not yet available, in 2007 an estimated 15 million people nationwide were in direct sales. Some 58 percent of became reps as a second job, according to the Direct Selling Association, a trade group that represents 200 U.S. companies.
When money began getting tight in Nicole Robinson's household in Garland, Texas, the full-time pharmaceutical sales rep signed up to host Mary Kay parties and give facials, working just six hours to make about $600 a week.
"Costs aren't going down and opportunities are tightening up. Raises and bonuses aren't as big. And I didn't want to ever be in a situation where we were in jeopardy," said Robinson, who joined Mary Kay Cosmetics Inc. in September.
Business declined at the international cell phone company her husband works for, she said, and they wanted to continue their moderate lifestyle and contribute to their children's college funds.
"We were looking for a plan B for our family to make additional income," she said. "We really didn't want to participate in the recession."
Rhonda Shasteen, chief marketing director for Mary Kay, said the Addison, Texas-based company saw traffic on its Web site increase by 108 percent in March, when the company began airing television ads to attract new sales reps.
The sales force grew 22 percent from January to March, compared with the same period last year. The privately owned company wouldn't say whether its profits also increased during that period.
Orlando, Fla.-based Tupperware Brands said globally it's making more money and has more people selling its products, spokeswoman Nora Alonso said.
Direct sales reps can earn commissions between 25 to 50 percent of retail sales, and some companies will also pay for recruiting a new sales person. Direct sellers also can earn rewards, too, including jewelry, handbags, furniture, appliances, cars and vacations.
There can be expenses. It costs about $10 to get the Avon starter kit of products and brochures, and some companies require the sales people to purchase products wholesale and then resell them. Mary Kay consultants purchase mascara for $7.50; the company recommends they sell it for twice that.
Companies that are members of the Direct Selling Association are required to have buyback programs where they refund at least 90 percent of costs to sales representatives who get stuck with products.
During stronger economies, people usually take on direct sales jobs so they can have money for leisure spending, said Larry Chonko, business ethics professor at The University of Texas at Arlington.
"Times are tough as we know and there is an absolute need for extra income," Chonko said. "Direct sales is not recession-proof, but it is the kind of business that even in a recession you can make success of it. And if you create a solid foundation now, then just wait until the economy comes out of the down cycle and goes into an up cycle."
Melanie Lyke, 29, of Thompson's Station, Tenn., began working as an Avon independent sales rep in November to supplement her income after a slowdown in the family's company, which makes training and demo videos for corporations.
"This is a great solution for people in need because I work at my own pace," Lyke said. "All you need is a clear goal and be determined to reach it."
Thursday, November 4, 2010
Sticky Boy!
Sticky Boy is the prototype of the acrylix stamps that Close to my Heart invented. Being the humorous company that they are, they made a video!!
Wednesday, November 3, 2010
Supply List for a New Scrapbooker
So often new scrapbookers ask me what supplies I think they need to get started. This morning I sat down to really make a thorough list of what I would have a newbie buy. So, here, in order of importance, are my suggestions:
Paper - My Reflections Scrapbook Kits and 12 x 12 Cardstock - You absolutely have to have paper or there is no page. If you only can afford one type, choose the cardstock but the pattern papers are truly beautiful and add so much.
Euro Personal Paper Trimmer - I don't know anyone who can cut perfectly straight with a pair of scissors. You HAVE TO HAVE a good trimmer to cut your paper and this one works well, it has measurements up to 12 inches and even measurements for cards.
Tombow Mono Adhesive and Memory Book Glue Dots - I have been waiting for years to find a good adhesive to hold the textured and heavier papers and it actually takes two adhesives that will work for nearly everything you create. Tombow works for nearly everything except metal or heavier accents like buttons. The Glue Dots take care of those super bulky and heavy items.
Micro-Tip Scissors - These are the best, sharpest scissors I've ever used, 'nuf said.
Foam tools - Distressing the edges of your papers is really big now and has been for a long time. It helps distinguish your pattern papers and cardstock from each other and gives your pages a nice rustic look. I find the best tool to use is a sponge with a handle.
Alphabet Stamp Set - To avoid the problem of running out of e's and a's with sticker and diecut alphabets, I use stamp alphabet sets. With a good ink pad, you are set for titles!!
Black ink - You'll need this to go with your alphabet stamp set and for distressing. Black is the color that will go best with most of your pages but it would be handy to get brown down the line too.
My Legacy Faux Leather Albums - Once you've made your beautiful pages, you need a pretty album to show them off in. These are gorgeous!
My Legacy Writer Black Pen - If you are not a person who likes to journal on your pages, that's okay BUT, you definitely want to at least label faces, places and dates on each page because, as you know, memory fades in time!
There's so much you can get once you have the basics above, embellishments, ribbons, buttons, brads, etc., but you will be off to a good start with this list. Have fun and if you need any of the items I posted, just click on the links and they will take you right to my website where you can buy and have everything sent right to your house. What could be easier than that?
BY THE WAY, SUBSCRIBE TO MY NEWSLETTER (LOOK TO THE RIGHT) AND FIND OUT MY SPECIAL FOR THE FIRST PERSON WHO ORDERS OFF MY WEBSITE THIS MONTH.
Paper - My Reflections Scrapbook Kits and 12 x 12 Cardstock - You absolutely have to have paper or there is no page. If you only can afford one type, choose the cardstock but the pattern papers are truly beautiful and add so much.
Euro Personal Paper Trimmer - I don't know anyone who can cut perfectly straight with a pair of scissors. You HAVE TO HAVE a good trimmer to cut your paper and this one works well, it has measurements up to 12 inches and even measurements for cards.
Tombow Mono Adhesive and Memory Book Glue Dots - I have been waiting for years to find a good adhesive to hold the textured and heavier papers and it actually takes two adhesives that will work for nearly everything you create. Tombow works for nearly everything except metal or heavier accents like buttons. The Glue Dots take care of those super bulky and heavy items.
Micro-Tip Scissors - These are the best, sharpest scissors I've ever used, 'nuf said.
Foam tools - Distressing the edges of your papers is really big now and has been for a long time. It helps distinguish your pattern papers and cardstock from each other and gives your pages a nice rustic look. I find the best tool to use is a sponge with a handle.
Alphabet Stamp Set - To avoid the problem of running out of e's and a's with sticker and diecut alphabets, I use stamp alphabet sets. With a good ink pad, you are set for titles!!
Black ink - You'll need this to go with your alphabet stamp set and for distressing. Black is the color that will go best with most of your pages but it would be handy to get brown down the line too.
My Legacy Faux Leather Albums - Once you've made your beautiful pages, you need a pretty album to show them off in. These are gorgeous!
My Legacy Writer Black Pen - If you are not a person who likes to journal on your pages, that's okay BUT, you definitely want to at least label faces, places and dates on each page because, as you know, memory fades in time!
There's so much you can get once you have the basics above, embellishments, ribbons, buttons, brads, etc., but you will be off to a good start with this list. Have fun and if you need any of the items I posted, just click on the links and they will take you right to my website where you can buy and have everything sent right to your house. What could be easier than that?
BY THE WAY, SUBSCRIBE TO MY NEWSLETTER (LOOK TO THE RIGHT) AND FIND OUT MY SPECIAL FOR THE FIRST PERSON WHO ORDERS OFF MY WEBSITE THIS MONTH.
Tuesday, November 2, 2010
VOTE TODAY!

I have the greatest dad in the world. He would drive us kids around in his old truck and try to impart the things he learned hoping it would help us in life. Sometimes we listened, sometimes we didn't. Now, of course, I listen to everything he says because I realize how incredibly smart he is. One of the things that dad always told us was how important it was to vote. He said by not voting you were being disrespectful to all those women and men who gave their lives over the past 200+ years so that we would be able to vote. He also told me that you can't complain about the country if you don't let your voice be heard.
LET YOUR VOICE BE HEARD TODAY! GET OUT AND VOTE!
(I have to go now, my husband is waiting to take me to the polls)
Close to my Heart is a Direct Sales Winner
I love to hear that other people think Close to my Heart is as awesome as I do! Check out this exerpt from Rachel Carpenter's article.
"Top Direct Sales Company for Women #1: Close to My Heart
Do you love to scrapbook? If so, you might make a fantastic direct sales representative with Close to My Heart. They have been in business since 1989 and sell scrapbooking and card kits, stamps and accessories. The consultant kit is $129 and the commission is 22 to 36%. Scrapbooking items are sold through parties, craft shows, in person and more. Check out the website here if you think you'd like to be a direct sales representative for a scrapbooking company."
Find the rest of the article right HERE.
"Top Direct Sales Company for Women #1: Close to My Heart
Do you love to scrapbook? If so, you might make a fantastic direct sales representative with Close to My Heart. They have been in business since 1989 and sell scrapbooking and card kits, stamps and accessories. The consultant kit is $129 and the commission is 22 to 36%. Scrapbooking items are sold through parties, craft shows, in person and more. Check out the website here if you think you'd like to be a direct sales representative for a scrapbooking company."
Find the rest of the article right HERE.
Monday, November 1, 2010
Free Stamp Set!!!
Looking for ways to s-t-r-e-t-c-h your Holiday Budget?
Dreading the parking, the crowds and the hassle of the mall?
Want to Give Gifts that are FUN?
Close To My Heart has exactly what you are looking for in November!
--Save up to 46% on your holiday shopping with Close To My Heart in November.
--Spend $100 in November and you will receive 2 FREE stamp sets* (up to a $45.90 value!). Click HERE for all the details.
--Host a home show and get even MORE products for free and ½ price as you help your friends Stretch their Holiday Budgets
Call me now to get your first choice of dates: (989) 906-6420
--Share the wealth! Host a show and divide the hostess gifts up among your guests and Everyone will receive More Free Gifts!
* With your $100 order in November 2010, get the A Little Thanks Stamp Set and your choice of another A-D size stamp set for FREE! Stamps that are not available as the second free set include Workshops on the Go™ Stamp of the Month, E-size, and customizable K-size. Tax and shipping/handling will apply. Offer good November 1-30, 2010.
November Stamp of the Month Artwork!

Dreading the parking, the crowds and the hassle of the mall?
Want to Give Gifts that are FUN?
Close To My Heart has exactly what you are looking for in November!
--Save up to 46% on your holiday shopping with Close To My Heart in November.
--Spend $100 in November and you will receive 2 FREE stamp sets* (up to a $45.90 value!). Click HERE for all the details.
--Host a home show and get even MORE products for free and ½ price as you help your friends Stretch their Holiday Budgets
Call me now to get your first choice of dates: (989) 906-6420
--Share the wealth! Host a show and divide the hostess gifts up among your guests and Everyone will receive More Free Gifts!
* With your $100 order in November 2010, get the A Little Thanks Stamp Set and your choice of another A-D size stamp set for FREE! Stamps that are not available as the second free set include Workshops on the Go™ Stamp of the Month, E-size, and customizable K-size. Tax and shipping/handling will apply. Offer good November 1-30, 2010.
November Stamp of the Month Artwork!

Sunday, October 31, 2010
Halloween quotes, titles and songs!

I hope you all are having a happy halloween!! How about this year you get your layouts done right away! Below are Halloween quotes, layout titles and Halloween songs (with lyric links) to help you out. Have a great time tonight!
QUOTES:
As spirits roam the neighborhoods at night,
Let loose upon the Earth till it be light...
- Nicholas Gordon
When witches go riding,
and black cats are seen,
the moon laughs and whispers,
‘tis near Halloween.
- Author Unknown
'Tis the night - the night
Of the grave's delight,
And the warlocks are at their play;
Ye think that without
The wild winds shout,
But no, it is they - it is they.
- Arthur Cleveland Coxe
Shadows of a thousand years rise again unseen,
Voices whisper in the trees, "Tonight is Halloween!"
- Dexter Kozen
Double, double toil and trouble; fire burn and cauldron bubble.
- Shakespeare
From ghoulies and ghosties And long-leggedy beasties And things that go bump in the night, Good Lord, deliver us!
- Scottish Saying
TITLES:
A Haunting We Will Go
Candyland
Chills And Thrills
Eat, Drink and Be Scary
Gruesome Twosome
Spooked
SONGS:
The Monster Mash (LYRICS HERE)
Thriller (lyrics here)
Ghostbusters (lyrics here)
Thursday, October 28, 2010
Fall quotes for your scrapbooks and cards
Autumn is a second spring when every leaf is a flower. - Albert Camus
Autumn is a season followed immediately by looking forward to Spring. - Anonymous
Autumn, the year's last, loveliest smile. - William Cullen Bryant
There is a harmony in autumn, and a luster in its sky, which through the summer is not heard or seen, as if it could not be, as if it had not been! - Percy Bysshe Shelley
As the first leaves change their colors for autumn's big show, we welcome the cool crispness in the air. - Sheri Bresnahan
Every leaf speaks bliss to me, fluttering from the autumn tree." - Emily Bronte
Now if these inspire you to get to work on your pages, check out the new Olivia paper that is perfect for fall pictures.
Autumn is a season followed immediately by looking forward to Spring. - Anonymous
Autumn, the year's last, loveliest smile. - William Cullen Bryant
There is a harmony in autumn, and a luster in its sky, which through the summer is not heard or seen, as if it could not be, as if it had not been! - Percy Bysshe Shelley
As the first leaves change their colors for autumn's big show, we welcome the cool crispness in the air. - Sheri Bresnahan
Every leaf speaks bliss to me, fluttering from the autumn tree." - Emily Bronte
Now if these inspire you to get to work on your pages, check out the new Olivia paper that is perfect for fall pictures.
Tuesday, October 26, 2010
Quick and Easy Thanksgiving Card
Wow, interesting day here in West Michigan. I had to spend much of the day in the family room in the basement due to that huge storm system that went across the entire midwest activating tornado warnings everywhere. Luckily all of my paper crafting supplies are down here and so I had a chance to make up just one more card kit for the card workshops I have coming up in November. This one is so easy. You just need some Olivia paper, a little ribbon and the Harvest Home stamp set.
1) Cut some barn red paper 5 1/2 by 4 1/4 inches.
2) Choosing three of your favorite papers from the Olivia set, cut one with a big pattern 4 by 2 1/2 inches and one less busy pattern paper 4 by 2 3/4 inches.
3) Cut some of the barely patterned paper 2 1/2 by 3 inches and a piece of barn red cardstock 2 3/4 by 3 1/4 inches.
4) Round the corners of the small barn red and plain pattern paper pieces.
5) Distress the edges of everything with cocoa ink.
6) Stamp the pumpkin on the Harvest Home stamp set in cocoa and color in (if you wish) with a blending pen and some sunset and sweet leaf ink on the plain pattern piece.
7) Glue that to the barn red piece.
8) Attach the bold pattern paper to the top of your card front barn red piece leaving about 1/8th of an inch border.
9) Add the less bold piece at the bottom, even overlapping the bold piece a bit making sure there is an 1/8th inch border.
10) Glue a piece of cocoa ribbon across the seam between the two pieces making sure to wrap around the back and glue. Cut small piece of ribbon, tie in knot and glue to left hand side of ribbon.
11) Stamp the May the Bounty phrase down at the bottom of the card as shown.
12) Using pop dots, attach the pumpkin piece 1 inch down from the top of the card, 1/4" from the right.
13) Cut a card base 8 1/2 by 5 1/2 inches, fold in half and glue your whole card to the card base.
Now, that was simple, right? You could make a ton of these. Click on these links below to buy your own paper, ribbon and stamp set in time for Thanksgiving.

Supplies: Olivia Level Two kit, Harvest Home Acrylix stamp set, Cocoa ribbon, Sunset ink,
Cocoa ink, Sweet Leaf ink, Pop Dots, Tombow Adhesive
1) Cut some barn red paper 5 1/2 by 4 1/4 inches.
2) Choosing three of your favorite papers from the Olivia set, cut one with a big pattern 4 by 2 1/2 inches and one less busy pattern paper 4 by 2 3/4 inches.
3) Cut some of the barely patterned paper 2 1/2 by 3 inches and a piece of barn red cardstock 2 3/4 by 3 1/4 inches.
4) Round the corners of the small barn red and plain pattern paper pieces.
5) Distress the edges of everything with cocoa ink.
6) Stamp the pumpkin on the Harvest Home stamp set in cocoa and color in (if you wish) with a blending pen and some sunset and sweet leaf ink on the plain pattern piece.
7) Glue that to the barn red piece.
8) Attach the bold pattern paper to the top of your card front barn red piece leaving about 1/8th of an inch border.
9) Add the less bold piece at the bottom, even overlapping the bold piece a bit making sure there is an 1/8th inch border.
10) Glue a piece of cocoa ribbon across the seam between the two pieces making sure to wrap around the back and glue. Cut small piece of ribbon, tie in knot and glue to left hand side of ribbon.
11) Stamp the May the Bounty phrase down at the bottom of the card as shown.
12) Using pop dots, attach the pumpkin piece 1 inch down from the top of the card, 1/4" from the right.
13) Cut a card base 8 1/2 by 5 1/2 inches, fold in half and glue your whole card to the card base.
Now, that was simple, right? You could make a ton of these. Click on these links below to buy your own paper, ribbon and stamp set in time for Thanksgiving.

Supplies: Olivia Level Two kit, Harvest Home Acrylix stamp set, Cocoa ribbon, Sunset ink,
Cocoa ink, Sweet Leaf ink, Pop Dots, Tombow Adhesive
Subscribe to:
Posts (Atom)


 Posts


